
Rising damp – it’s not just the title of a 1970s British sitcom, but a very real problem that can plague our homes. If you’re noticing mysterious damp patches creeping up your walls (and maybe wondering if your house is trying to grow a moat), don’t panic.
In this guide, we’ll walk you through what rising damp is, how it happens, what it looks (and even smells) like, and most importantly, how to fix it. Consider this advice straight from a trusted friend who’s seen it all – with a friendly touch of humour to ease the gloom (damp puns intended!).

What Is Rising Damp?
Rising damp is a form of structural dampness caused by moisture from the ground travelling upwards into the walls or floors of a building. In essence, your walls start behaving like the wick of a candle, drawing up water by capillary action through porous materials such as brick and mortar. This can only occur on walls that are in contact with the ground (basements or ground-floor walls) – you won’t find true rising damp on your first-floor bedroom ceiling, for instance. Typically, the moisture will rise to somewhere around 30 cm to 1 metre high and then stop, because gravity and evaporation balance out the capillary force. In rare cases, it might reach higher (up to about 1.5 m), but that’s unusual.
Modern buildings are constructed with a barrier near the base of the walls called a damp-proof course (DPC). The DPC – often a plastic membrane or slate layer about 6 inches above ground – is designed to stop ground water from rising into the wall. However, if a building has no DPC (common in older properties from before the late 19th century) or if the DPC is damaged or bridged, then rising damp can take hold.
Signs of Rising Damp: What It Looks, Smells, and Feels Like
How do you know if that blotchy wall is due to rising damp? Here are the tell-tale signs and sensations:
Damp patches at the bottom of walls:
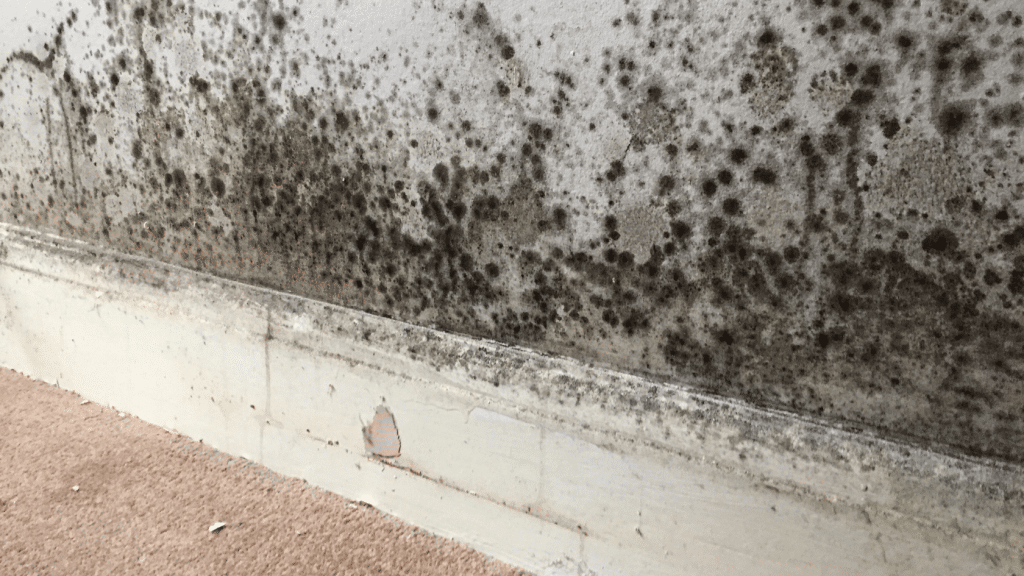
Look for discoloured or wet patches on interior plaster starting from the skirting board upwards. The dampness typically fades out around a consistent height (often below 1 metre). Walls may feel damp or cold to the touch in these areas.
“Tide marks” and salt stains:
A key giveaway is a tidemark stain on the wall, usually a yellowy-brown or dark stain at the peak of the moisture rise. You might also see a white, powdery residue (efflorescence) on the wall surface – these are salts carried up from the ground and left behind as the water evaporates. The presence of ground salts in plaster and brick is a strong indicator of rising damp (they often form a crusty white deposit and can make paint or wallpaper peel).

Peeling paint or wallpaper:
Because the lower wall is damp, paint may bubble and wallpaper can peel or lift away near the floor. You might notice plaster deteriorating – blistering, flaking or crumbling plaster is common as moisture breaks it down. Wood trims like skirting boards may rot or warp, sometimes becoming soft or showing signs of decay.
Musty smell and mould:
Rising damp often comes with a musty, earthy odour – that dank “old cellar” smell you can’t miss.The damp environment can encourage some mould or mildew growth near the base of walls (you might see black spots on skirtings or carpets). However, black mould is less typical with true rising damp – the salts in the wall usually inhibit mould growth, so if you see extensive black mould higher on walls or across corners, condensation might be the bigger culprit.
Rust or exterior damage:
If you check the external side of the wall, you might find mortar turning crumbly or powdery and metal fixings (like nails or screws in the wall) rusting due to the internal moisture. Outside brickwork may show a visible salt line or algae where the dampness stops.
These symptoms often become more noticeable in winter months. Cold weather and heating your home can draw more moisture into the walls and make damp patches and smells more pronounced. But rising damp is usually active year-round as long as there’s moisture in the ground – so those signs won’t completely disappear in summer, they just might be a bit less obvious.

Common Causes of Rising Damp
So why is water climbing your walls in the first place? The short answer: something is allowing ground water to sneak in. Here are the usual suspects behind rising damp:
No or faulty damp-proof course:
In many cases, the property either lacks a damp-proof course (common in houses built before DPCs became standard in the late 1800s) or the existing DPC has deteriorated or failed over time. Old bitumen or slate DPCs can crack, and if that waterproof layer is compromised, nothing stops moisture from wicking up.
Bridging of the DPC:
Even if a DPC is present, it can be rendered useless if bridging occurs. High external ground levels are a prime cause – for example, if you’ve piled up soil for a flower bed or added a new patio that sits above the DPC line, water can bypass the barrier. Similarly, if internal plaster or render was applied over the DPC line, or rubble/debris has accumulated in a wall cavity, these can create a “bridge” that lets moisture climb around the DPC. Always check that soil, driveways, or raised interior floors aren’t covering the damp-proof course.
Building defects and alterations:
Sometimes construction flaws or renovations introduce pathways for water. For instance, an incorrectly installed DPC (placed too low, or with gaps) won’t do its job. If a previous owner replaced a floor with a solid concrete floor without proper damp-proof membrane, moisture can travel up walls at the edges. Even something like insulation stuffed into a cavity wall inappropriately can draw up moisture (by capillarity or by pushing damp towards the inner wall).
Ground water and drainage issues:
The amount of moisture in contact with your walls matters. Heavy rain or poor drainage around the house can load the soil with water, which then is readily absorbed by the foundation and walls. If gutters and downpipes are leaking near the base of the wall, or the ground slopes toward the house causing puddling, you’re effectively inviting water to linger at your walls. Over time this can overwhelm even an intact DPC or find any little crack to seep upward. (One 19th-century observation noted that if a damp-proof course is placed very low, rain splashing from the ground can even bounce above it, defeating its purpose!) In short: a wet environment at the base of your wall will exploit any weakness in your damp protection.
In essence, rising damp happens when your building’s defences against ground moisture fail. Rain itself doesn’t directly cause rising damp – it’s not rain soaking through a wall (that’s usually penetrating damp). Instead, rain contributes by saturating the ground. The water then rises from the soil into the structure because nothing is properly stopping it.

Is Rising Damp a Myth? (Misdiagnosis and Debate)
You might have heard the provocative claim that “rising damp doesn’t exist” – often from someone quoting a certain expert or a skeptical article. So, what’s the deal? Is rising damp real or just a misdiagnosed myth?
The truth lies in the middle. Rising damp does exist, but it is frequently overdiagnosed or misdiagnosed in buildings. Because many types of damp problems can look similar to the untrained eye, some surveyors or contractors have mistakenly labelled condensation or leaks as “rising damp” when they were not. This has led to confusion and the impression that any mention of rising damp might be a scam.
Here are a few points in the debate:
A history of skepticism:
A former chairman of the RICS (Royal Institution of Chartered Surveyors), Stephen Boniface, once stirred the pot by saying “true rising damp is a myth” – but he later clarified he only meant it’s extremely rare and often misused as a diagnosis. His intention was to shock people into questioning diagnoses, not to claim that physics is wrong. In fact, building scientists have long documented rising damp (even as far back as Roman times!) and fully understand its mechanics. It’s predicted by the laws of physics and observed worldwide – so rising damp is real, just not as ubiquitous as some might think. Source: Wikipedia
Misdiagnosis is common:
Many cases of “damp” in houses are actually due to condensation or penetrating damp, but these sometimes get wrongly tagged as rising damp by less experienced surveyors or by contractors who happen to sell damp-proofing treatments. For example, condensation can cause black mould and damp patches on walls, and an over-enthusiastic contractor might call it rising damp and suggest an expensive chemical DPC installation, which won’t actually solve the issue. Homeowners have ended up paying for unnecessary treatments because of such misidentification. This misuse understandably created some cynicism about rising damp.
Famous challenge:
In the 1990s, one London council (Lewisham) was so doubtful about rising damp prevalence that they famously offered a £50 reward for anyone who could show them a genuine case of rising damp in one of their houses. They never had to pay out! While this made headlines, it likely says more about other damp problems being more common, rather than proving that rising damp can’t happen at all. (It also might indicate that council houses mostly had proper DPCs or other damp issues.). Source: Wikipedia
Professional consensus:
The Building Research Establishment (BRE) and other scientific bodies have concluded that rising damp is a real phenomenon – but they also acknowledge it’s often overestimated as the cause of dampness. In practice, true rising damp requires specific conditions (groundwater source + lack/failure of DPC) and these conditions aren’t present in every “damp” house. That’s why many experts stress proper diagnosis (see next section) – so that you treat the actual cause of damp in a given case.
Bottom line: Rising damp is not a myth, but it is sometimes treated like Bigfoot – blamed for every creak and leak when something else might be the real culprit. With careful inspection and perhaps laboratory analysis of salts/moisture in walls, professionals can confirm if you truly have rising damp or something else. Always be wary of anyone who diagnoses rising damp within two minutes of glancing at a wall and immediately sells you a quick fix. A reliable damp survey will get to the truth so you can target the solution correctly.
Rising Damp on Internal Walls vs External Walls
Rising damp doesn’t discriminate – it can affect both external walls and internal walls, as long as they are in contact with moisture in the ground. However, there are some differences in how it might present and what to consider:
External Walls:
These are the outside-facing walls of your building. If rising damp is affecting an external wall, you may notice some signs on the outer side of the wall in addition to the inside. For instance, brickwork or mortar near ground level might show a tide mark or white salt deposits. The mortar could be crumbly or powdery from prolonged damp, and you might even see algae or moss at the base of the wall where it’s wet. On the inside face of that same wall, you’ll typically see the classic interior signs (peeling paint, damp plaster, etc.). External walls are more often exposed to sources of moisture (rain splash, higher ground outside, etc.), so rising damp on an external wall often pairs with issues like high outside ground level or poor drainage as contributing factors. Part of the fix will usually involve addressing those outside conditions (for example, lowering the soil or improving drainage) to prevent continual saturation.
Internal Walls:
Here we mean walls that divide rooms inside or party walls between terraced/semi-detached houses. Can these get rising damp? Yes – if they extend down into ground that’s damp and lack a proper DPC. In many homes, internal partition walls sit on the ground slab or foundation. If that foundation area is not protected or if moisture is traveling up from adjacent structures, an internal wall can show rising damp symptoms much like an external wall. You’ll see damp patches starting at the floor, plaster damage, and maybe salts on these walls too. However, true rising damp in internal walls is less common because most internal walls in modern construction are built with some moisture barrier or they’re not sitting directly on wet ground. If you have an older house (say Victorian or Edwardian), internal walls might have no DPC, so it’s possible there. One thing to watch: damp on an internal wall might alternatively be due to something like a plumbing leak or condensation (especially if it’s a bathroom wall or behind a kitchen). So, it’s crucial to rule those out with a survey. If only one isolated internal wall is damp in the middle of the house, double-check for pipes or other sources. But if it’s truly rising damp, the pattern (damp at bottom, salts, etc.) will be similar to that on external walls.
In practice, treating rising damp in an internal wall vs an external wall is largely the same process (installing or repairing a DPC, and re-plastering, which we’ll cover next). The main difference is ensuring you’ve removed any bridges that caused it. For an internal wall, that might mean checking if plaster or floor level was bridging moisture. For an external wall, it often means fixing outside ground levels or defects. Both cases benefit from a professional assessment. Remember, rising damp on ground-floor walls only – if you’re seeing damp on an upper-floor internal wall, it’s not rising damp (could be condensation or a leak from the roof/plumbing). And as a quick note, basements can get a form of rising damp in their below-ground walls, but usually by the time moisture is coming through basement walls, we call it penetrating damp or just groundwater ingress (the solution there is different, involving tanking or waterproof membranes).
How to Treat Rising Damp (Fix It and Prevent It Coming Back)

Now for the big question: how do you actually fix rising damp and dry out your walls? Successful treatment comes down to two things: stopping more water from rising, and dealing with the salt-damaged materials that are already affected. Here’s a breakdown of the process:
Accurate diagnosis and remove the source
Before jumping into remedies, ensure (ideally via a survey) that you really have rising damp and not another issue. Identify any sources of excessive moisture. If the issue is bridging (for example, soil piled against the wall), the first “treatment” is to remove that bridge so the wall is no longer getting a direct feed of moisture. There’s no point injecting a new damp-proof course if, say, your garden bed’s soil level is above the existing DPC – that soil needs to be lowered or isolated. Likewise, fix any leaky gutters or downpipes keeping the base of your wall wet. Think of this step as fixing the building faults and ensuring the area can dry. In some cases, removing the cause might be all that’s needed (if the DPC was fine but just covered or bypassed).
Install or repair a damp-proof course (DPC)
The core of rising damp treatment is almost always to create a new barrier against the upward water. The most common method today is a chemical DPC injection. This involves drilling small holes into the mortar joint along the base of the wall and injecting a special silicone-based cream or fluid. The chemical spreads and soaks into the bricks/mortar, then cures to form a water-repellent band within the wall. Essentially, it’s an artificial DPC preventing water from rising past that line. Chemical DPC injections are popular because they are relatively quick, cost-effective, and minimally invasive (no need to rebuild the wall). When done by a professional, modern injection creams have a high success rate and last for many years. Alternative methods: In some situations (especially historic walls or severe cases), a physical DPC might be installed. This is more involved – a contractor will either insert sheets of waterproof material or use metal damp-proof courses, often by cutting into the mortar course brick by brick to slide the membrane in. It’s a lot of work and is usually only done if chemical methods aren’t suitable (for example, very thick stone walls where injection won’t spread evenly). Another approach sometimes used is electro-osmotic systems, which use small electrical currents to repel water, though these are less common. For most homeowners, chemical DPC injection is the go-to solution to stop rising damp.
Specialist re-plastering (rendering)
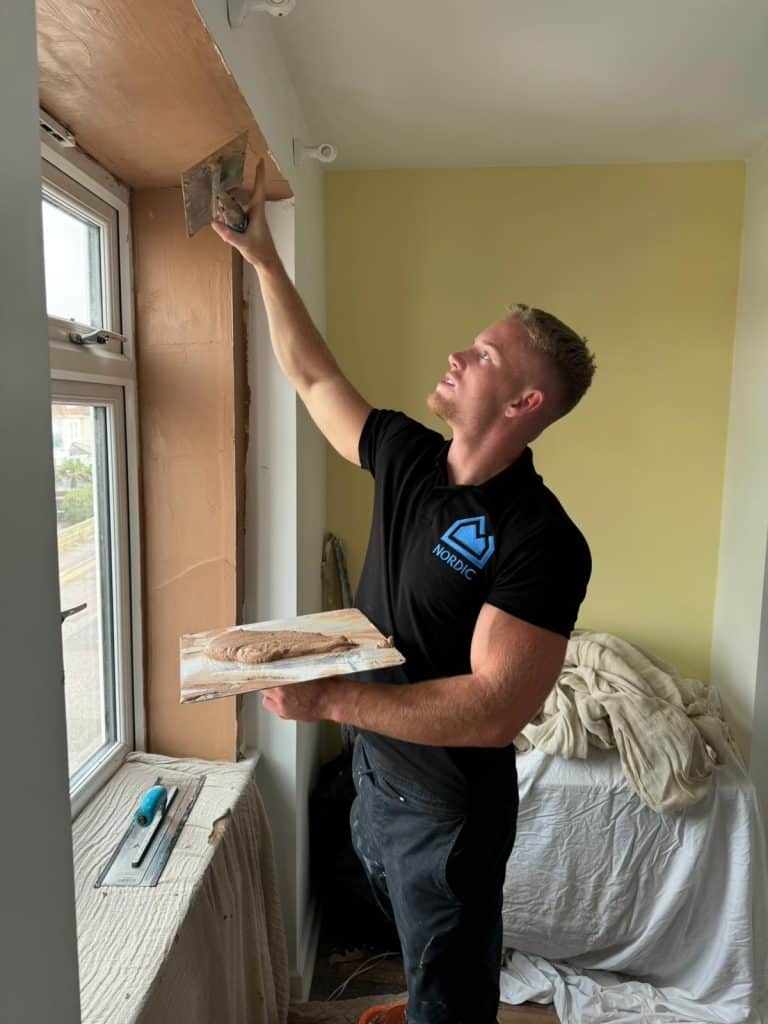
Stopping the water is only half the battle. Remember those salts we talked about? They’re left behind in the plaster and masonry and will continue to attract moisture from the air (hygroscopic salts can suck humidity right out of indoor air and make the wall damp again). That’s why after a new DPC is installed, the old plaster in affected areas must be removed and replaced. A qualified damp-proofing contractor (Like us!) will hack off the salt-contaminated plaster, usually up to about 1 metre high or a bit above the last visible stain. Then they’ll re-plaster with a salt-retardant render or plaster mix. Often, a sand-cement render with salt-inhibiting additives is used, or a renovating plaster that is designed to be breathable but salt-resistant.
This new plastering is crucial – if you just let the wall dry and paint over the old salty plaster, those salts could keep causing damp patches or efflorescence, even after the DPC is in place. In some systems, contractors may first apply a liquid salt neutraliser or even attach a thin damp-proof membrane on the wall before plastering to ensure salts don’t leach through. After re-plastering, the wall will need time to dry out (a newly injected wall can take several months to fully dry, roughly 1 month per inch of wall thickness as a rule of thumb). But since the fresh plaster is isolating the salts, you can usually redecorate within a couple of weeks using a breathable paint.
Important: make sure your plasterer follows the specified mix – using gypsum plaster alone is a no-no on these walls until they are completely dry, as gypsum is easily ruined by any residual moisture/salts.
Monitoring and prevention
Once treatment is done, keep an eye on the area. The contractor should measure moisture to confirm things are drying out over time. You’ll also want to maintain good practices: keep exterior ground levels appropriately low, maintain drainage and guttering, and avoid doing anything in future that could bridge the new DPC. A quality damp-proofing treatment often comes with a guarantee (often 20-30 years), so hold onto your paperwork. That guarantee is typically insurance-backed if the contractor is reputable. It gives you peace of mind that “it won’t come back” – and if it does, they’ll fix it.
By following these steps, you address rising damp holistically: We find it. We treat it. We stop it coming back. In other words, identify the problem correctly, fix the cause, and repair the damage. Speaking of finding and treating – who should you trust with this task? Let’s cover that next.
Who Should Treat Rising Damp (and Why Use a Professional)?
Treating rising damp is not your average DIY job. It involves understanding building structure, knowing the difference between damp types, and using specialised materials. Here’s why you should call in the pros and what to look for:
Professional diagnosis:
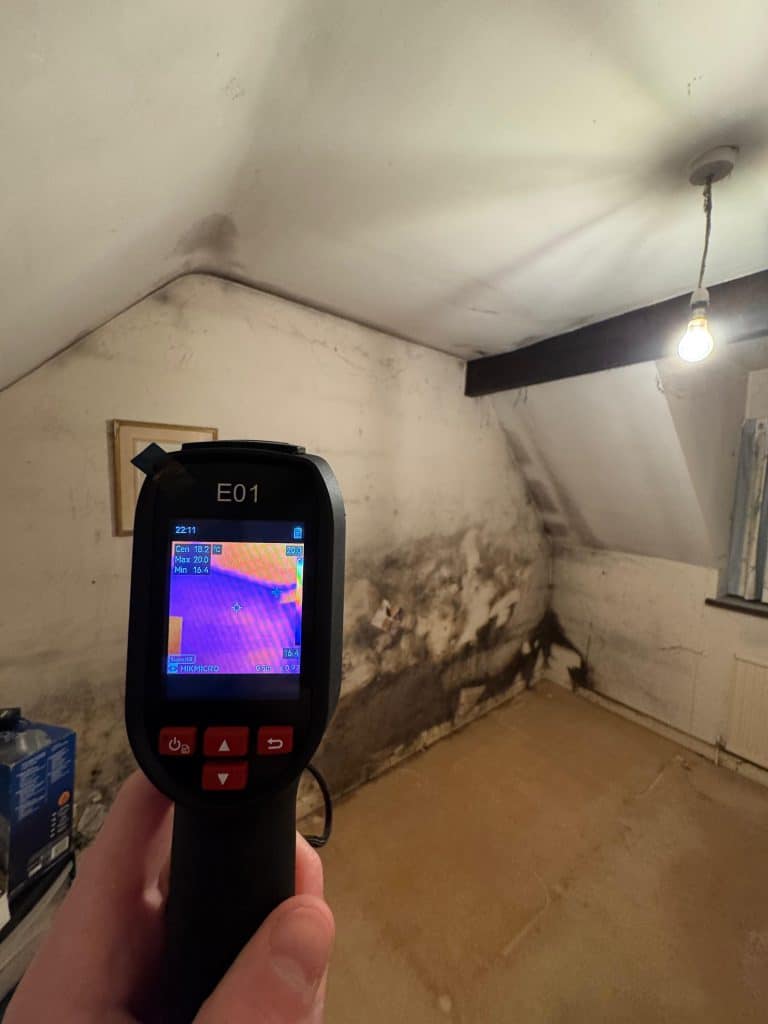
A certified damp surveyor or damp-proofing specialist is trained to distinguish rising damp from other issues. They will typically perform a thorough inspection – checking the property’s history, looking for a DPC, using moisture meters correctly, possibly taking salt tests or masonry samples. This step is vital. Misdiagnosing can lead to either doing nothing when action is needed (if someone wrongly says “ah, it’s just condensation” but it was rising damp), or doing costly treatments that don’t fix the problem (injecting a DPC where the real issue was a plumbing leak, for example). Professionals often follow guidelines like the British Standard BS 5250 or PCA (Property Care Association) best practices to ensure they pinpoint the cause before recommending repairs. In short, a professional finds the root cause so that the treatment will actually work.
Qualified expertise:
When selecting a contractor or surveyor to treat rising damp, look for credentials. In the UK, PCA-registered companies or surveyors with certifications like CSRT or CSTDB (Certificated Surveyor in Remedial Treatment / in Timber and Dampness) have proven expertise. These qualifications mean the person understands building pathology and the science of damp. A qualified professional will not only be skilled in applying the remedy (like correctly injecting the DPC cream in the right pattern) but also in recognising any complicating factors (maybe sub-floor ventilation issues, etc.). Using a pro also means you’ll get a guarantee on the work – most reputable damp-proofing firms offer long-term guarantees on their DPC installations and plastering. That guarantee is worth it in case there’s any recurrence.
Safety and thoroughness:
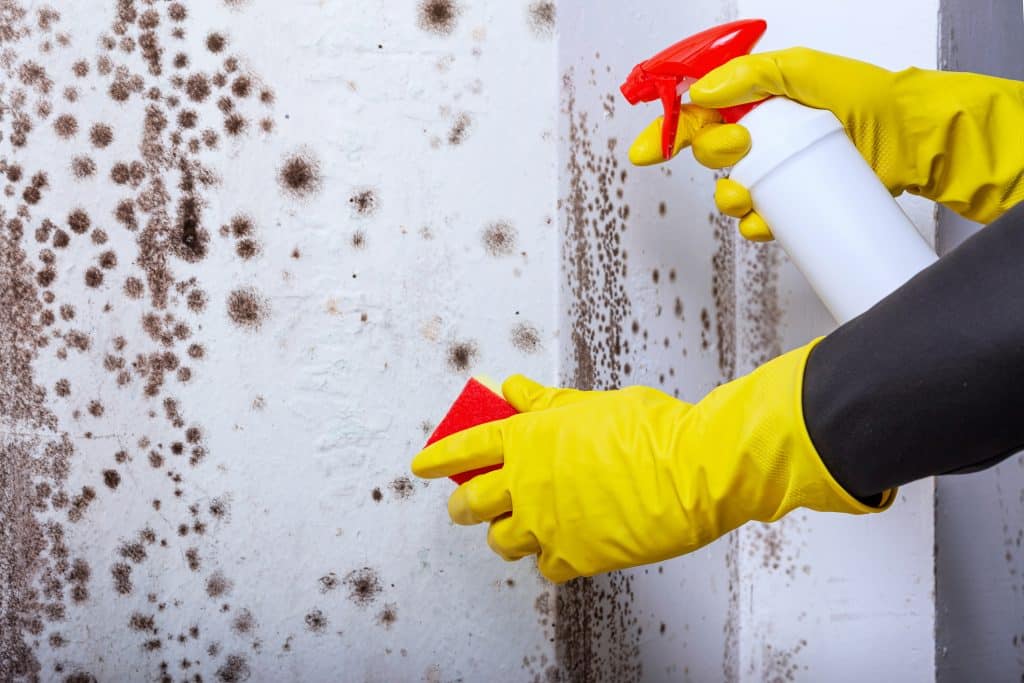
Some aspects of damp treatment, like handling mouldy materials or drilling into masonry at regular intervals, are messy and can be hazardous without proper tools (e.g., you don’t want to inhale mould spores or silica dust without precautions). Professionals come equipped with the right tools (industrial injection pumps, moisture meters, protective gear) and will dispose of any mouldy or salt-laden materials safely. They’ll also be able to undertake associated tasks properly, such as removing and refitting skirting boards, or taking off plaster without causing unnecessary damage to your walls.
Avoiding cowboys:
Unfortunately, the damp-proofing industry has had its share of less-than-honest operators. We’ve all heard stories of “cowboy” contractors who diagnose rising damp everywhere and pressure homeowners into expensive work. This is another reason to choose a trustworthy specialist – preferably one recommended by a respected trade body or with strong local reviews. A true professional will also tell you if you don’t need a chemical DPC (for instance, if the damp problem is actually something else). They have a reputation to uphold and won’t sell you a treatment that’s not appropriate. When you hire someone who knows their stuff, you’re paying for the right solution, not a shot in the dark.
In summary, fixing rising damp is definitely a job for the experts. A professional damp survey and treatment might cost a bit, but it’s absolutely worth it to permanently solve the issue and protect your biggest investment – your home. Correct diagnosis is key, and with something as tricky as damp, you want the people who “find it, treat it, and stop it coming back” on your side.
We Find It. We Treat It. We Stop It Coming Back. With the right approach and professional help, rising damp can be vanquished for good – leaving your home dry, comfortable, and free of that unwelcome tide mark creeping up the walls. And that’s far better than any sitcom ending!