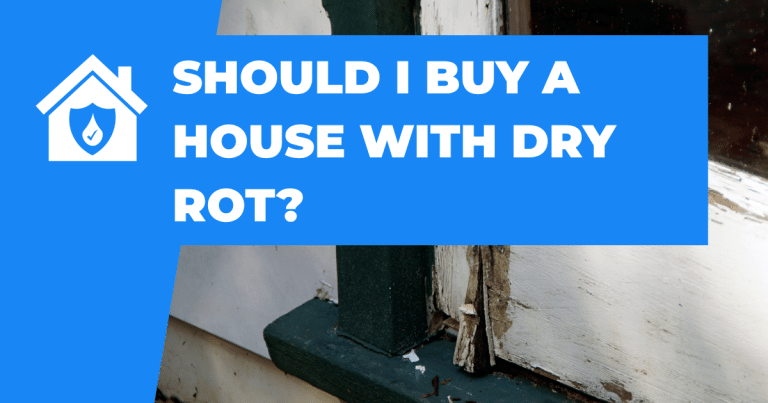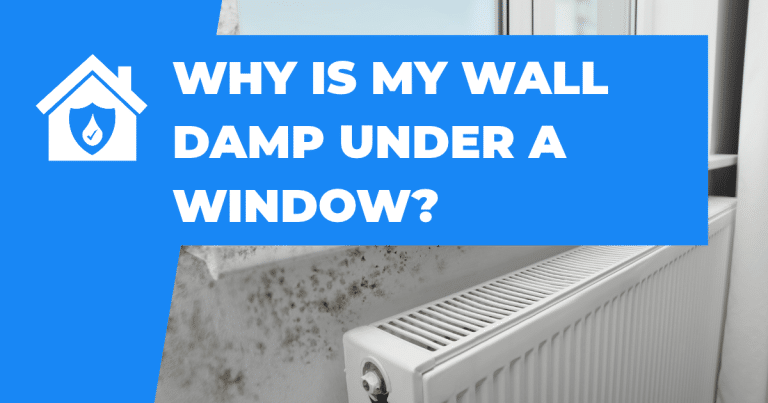
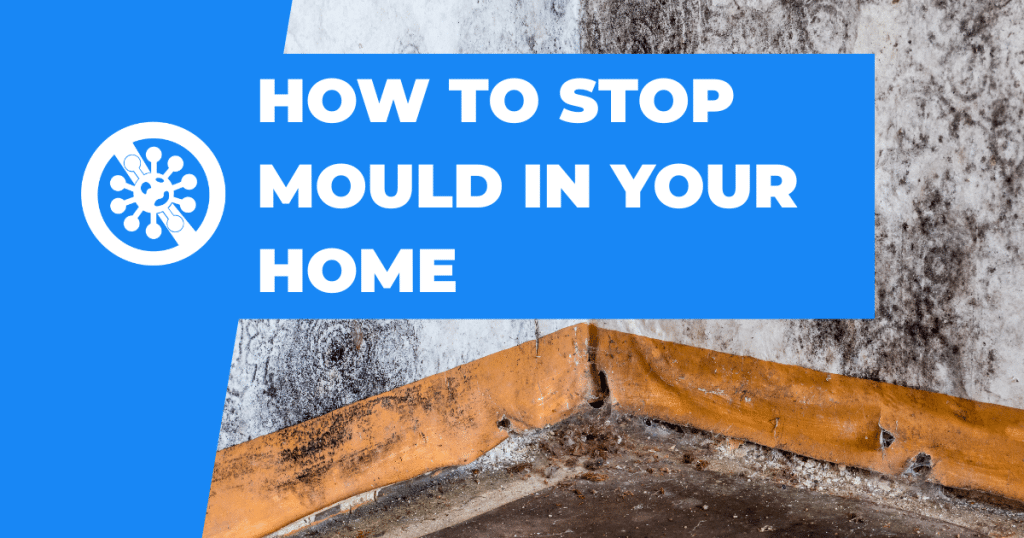
Mould growth is a common problem in many homes, especially in damp or poorly ventilated areas. It’s not just an unsightly nuisance – household mould can pose health risks and even damage your property if left unchecked. This guide will explain what mould is, the types of mould you might encounter, the impacts of mould on health and the home, and provide DIY prevention tips and safety advice. We’ll also cover the use of dehumidifiers, outline a short-term vs. long-term plan for dealing with mould, and answer specific questions like why mould appears when it rains or in kitchens. If you’re buying a house with mould, we’ll discuss what to do, including when to book a professional mould survey.
(Remember: “The key to mold control is moisture control,” as experts say. Addressing the root cause of damp is crucial to stop mould for good.)
What Is Mould?
Mould is a type of fungus that thrives in damp, humid conditions. There are millions of mould species in the environment, though typically fewer than ~50 species are routinely found indoors. Mould reproduces by releasing microscopic spores that float in the air; these spores are everywhere around us. **Indoors, mould spores only develop into growing mould patches if they land on a wet or damp surface. In a dry, well-ventilated building, you won’t usually get mould growth because the spores don’t find the moisture they need to colonise.
Common indoor moulds include various species such as Cladosporium, Aspergillus, Penicillium, Alternaria, and the infamous “black mould” Stachybotrys. Mould often appears as a fuzzy or slimy coating on surfaces, in colours like black, green, white, or even blue. It feeds on organic materials (drywall paper, wood, fabrics, dust, etc.), gradually digesting and destroying the material it grows on. This is why you might see paint peeling or wood rotting in areas with long-term mould – the fungus is literally eating into it.
Types of Mould
Mould in homes can come in various colors and strains. It’s hard to identify the exact species without lab tests, but here are a few common types of household mould and their characteristics:
Green Mould:
Often appears as green or greenish-black fuzzy patches. Green mould in homes typically belongs to genera like Aspergillus, Cladosporium or Penicillium. It’s frequently found on damp walls, inside cupboards, on carpets, or even on fabrics and mattresses that stayed moist. Green mould not only looks unpleasant and can eat away at paint or wallpaper, but certain strains (e.g. some Penicillium species) can cause health issues like sinus infections or bronchitis if left untreated It’s best to clean it promptly and address the moisture source.

White Mould:
Often found in cool, damp areas like basements, cellars, or on wooden structures. White mould has a powdery or fluffy white appearance and can sometimes be mistaken for efflorescence – a white crystalline salt deposit on masonry. (One way to tell the difference is to spray water on it; true mould will not dissolve). White mould tends to grow on porous materials like wood, drywall, or fabric in unventilated spaces. While it may look “less scary” than black mould, it can still cause damage and allergies over time, so you should remove it.
Black Mould:
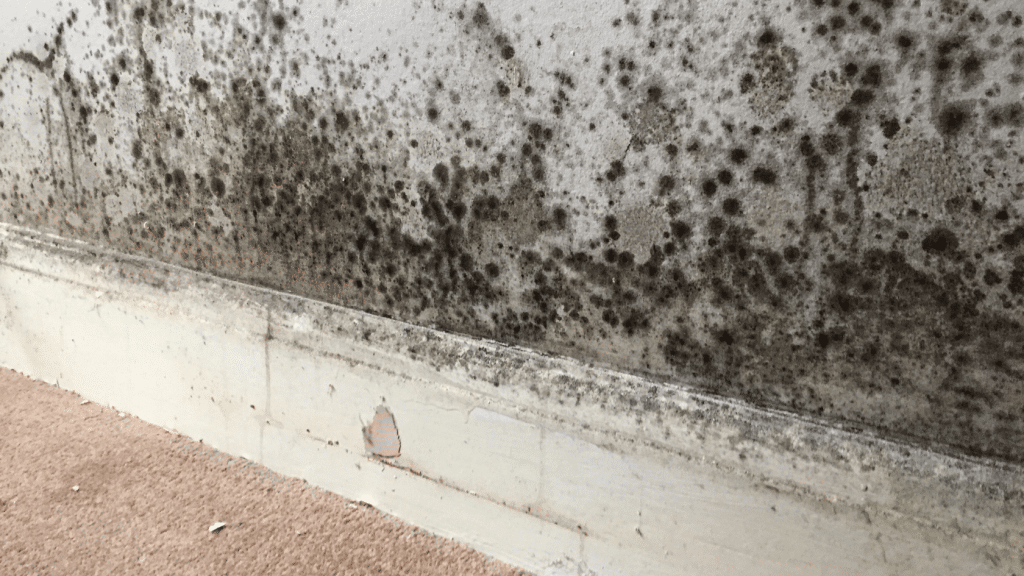
Black mould is the one to watch out for. Not all black-colored mould is the toxic kind, but the term “black mould” usually refers to Stachybotrys chartarum, which is sometimes called toxic black mould. This mould is dark greenish-black and often develops on materials that have been wet for a long time (for example, after a flood or chronic leak) and are rich in cellulose (such as wood, paper, plasterboard). Stachybotrys produces mycotoxins, which are potent toxins that can become airborne on mould spores. Exposure to these mycotoxins (through inhalation or skin contact) can lead to serious health problems – affecting the respiratory system, causing skin rashes, and even neurological effects in severe cases. Fortunately, most dark moulds you find in bathrooms or walls are common strains that can be treated with normal methods, but if you suspect extensive toxic black mould, you should get professional help due to the health risks.
Other mould colors – like blue-grey or orange moulds – can also appear, though less frequently. In general, any visible mould in the home, regardless of color, should be cleaned up and the cause of moisture fixed. All mould can potentially cause harm or property damage if allowed to spread.
Impacts of Mould in Your Home
Mould can have significant impacts on both your health and your home’s condition. Here’s why you shouldn’t ignore it:
Health Risks
Mould releases thousands of tiny spores into the air. When we breathe these in, they can irritate our airways and trigger allergic reactions. About 5% of people are allergic to mould spores, but even those who aren’t can experience issues. Common symptoms include nasal stuffiness, coughing, wheezing, throat irritation, sneezing, or skin rashes. In people with asthma or other respiratory conditions, mould can exacerbate asthma attacks or chronic lung issues – in fact, living in a damp/mouldy home is associated with increased asthma rates. Long-term exposure to high levels of mould spores has been linked to more severe problems like allergic alveolitis and respiratory infections. Children, babies, the elderly, and those with weakened immune systems are particularly vulnerable. In extreme cases (especially with toxic black mould), serious lung infections can occur. The bottom line: a mouldy home can literally make you sick or worsen pre-existing health issues.
Property Damage:
Mould is a sign of excess moisture, which can gradually harm your house. Dampness and mould growth can deteriorate paint and plaster (you might notice discoloured spots, peeling wallpaper or blistering paint where mould is present). If mould continues, drywall or wood structures can start to rot or weaken. Over time, the materials can crumble or need replacement. There’s also often a persistent musty odour in a mouldy room, which can permeate carpets, furniture and clothes – not exactly the kind of “air freshener” you want at home. Mould and damp also drive chemical reactions in building materials; for example, prolonged damp can cause wood to decay or metals to corrode, and can release unpleasant or harmful compounds into the indoor air. All of this can reduce your home’s value and be costly to repair if left unresolved.
Quality of Life
Beyond the physical health effects, living in a damp, mouldy environment can impact mental well-being. It’s stressful to see black mould creeping up your walls or to smell that mildew odor all the time. Studies have found higher rates of anxiety and depression among people living in cold, damp homes. Plus, constantly cleaning mould or dealing with damage is a hassle. Addressing the problem can bring peace of mind and comfort back to your living space.
In short, mould is not just an ugly stain – it’s a hazard. It can make your family unwell and gradually destroy parts of your home. This is why UK authorities have emphasised the imperative to respond quickly to damp and mould issues and not to ignore even small patches.

DIY Mould Prevention Tips
Preventing mould is largely about controlling moisture indoors. Since mould needs dampness to grow, your goal is to keep your home as dry and well-ventilated as possible. Here are some effective DIY prevention tips:
Ensure Good Ventilation
Proper airflow in your home will carry away moisture before it settles. Open windows for a while each day to let fresh air in – even in winter or when it’s raining, it helps (you might crack them open briefly during a break in the rain). Use extractor fans in the kitchen when cooking and in the bathroom when showering. Even on rainy days, try to vent out humid air; one expert notes that when it’s cold or wet outside we tend to shut windows and indoor humidity rises – but that trapped hot moist air needs to be “tricked out” (vented) or it will condense on walls and cause mould. If you don’t have built-in exhaust fans, consider a portable dehumidifier or at least open windows a crack during and after cooking/showering. Also, allow air to circulate within rooms: avoid pushing furniture right up against external walls – leave a small gap so the wall can “breathe” and doesn’t trap moisture behind wardrobes or couches. Similarly, don’t over-stuff closets and cupboards; overcrowding can restrict air flow and encourage mould in those spaces
Reduce Indoor Humidity:
Everyday activities can pump a lot of water vapor into your home’s air. Be mindful of these and mitigate where possible. For example, dry clothes outside if you can, or in a tumble dryer vented to the outside. If you must dry clothes indoors, do it in a single room with the door closed and a window open or a fan on (bathrooms are ideal for this). Do not hang wet laundry on radiators throughout the house – that dumps moisture into the air very quickly and can cause condensation on walls. When cooking, keep lids on pans to reduce steam and use the cooker hood/extractor fan if available. Also, avoid leaving kettles boiling longer than needed. An easy tip for baths: run a bit of cold water before hot water when filling the tub – this dramatically cuts down steam (by up to 90% less steam) compared to pouring hot water first. Little habits like these make a big difference in humidity levels.
Control Condensation

In colder months, condensation on windows and walls is a common source of indoor damp. To combat this, try to keep indoor surfaces from getting too cold. Use your heating effectively – it’s better to have a steady, moderate heat in rooms you use (say 18-21°C) rather than letting them get icy cold. A constantly cold wall will attract water from warm air like a magnet. If you notice condensation on windows each morning, wipe it dry with a cloth and wring the cloth out into the sink (don’t just leave a wet cloth on a radiator, which puts that moisture right back in the air). You can even get inexpensive condensation catchers or sponge strips for windowsills to absorb water. Make sure any trickle vents in your window frames are kept open to allow a little airflow, even when windows are closed. Another tip: if you have blinds or thick curtains, open them up during the day – this lets air circulate on the window and warms it up a bit, reducing condensation behind them.
Fix Leaks and Sources of Damp Promptly:
Not all moisture comes from the air – some comes from building defects. Inspect your home for any leaks or water ingress. For example, a leaky pipe under a sink, a dripping tap, or a faulty gutter or roof could be introducing water that feeds mould. If you find any leaks, repair them quickly. Check areas like under sinks, around the bath/shower seals, the loft (for roof leaks), and exterior walls (for any cracks or damaged pointing where rain gets in). Also, ensure gutters and downpipes are clear and not overflowing onto walls. Something as simple as a blocked gutter can cause a wall to stay wet whenever it rains, leading to internal damp patches and mould. Keeping your home’s exterior in good repair (roof, walls, windows) is a key part of mould prevention.
Maintain Balanced Heating:
We touched on this, but it’s worth emphasising: a cold home with sporadic heating is more prone to mould. It may be tempting to keep the heat off to save money, but letting rooms drop to very low temperatures can create the perfect cold surfaces for condensation to form. It’s more effective to heat rooms to a livable temperature and avoid extreme drops. If heating costs are a concern, focus on warming the most used rooms and consider improving insulation (loft insulation, draught-proofing, etc. – though make sure to also maintain ventilation). And as odd as it sounds, remember not to heat your home with a gas cooker or gas stove – burning gas releases moisture (and carbon monoxide risk), so using a cooker to heat a kitchen will actually add humidity.
By following these steps, you can greatly reduce the chances of mould taking hold. Many of these are simple habits and maintenance tasks that prevent the moist conditions mould loves. As one UK council summarises: most mould can be prevented by managing three things – moisture, ventilation, and heating. Keep those in balance, and mould will struggle to gain a foothold.
Safety Advice for Mould Removal
If you already have a mould problem in your home, you may choose to tackle smaller areas yourself. However, safety is paramount when cleaning mould, as you don’t want to inhale a bunch of spores or spread the contamination. Follow these safety guidelines for DIY mould cleanup:
Do:
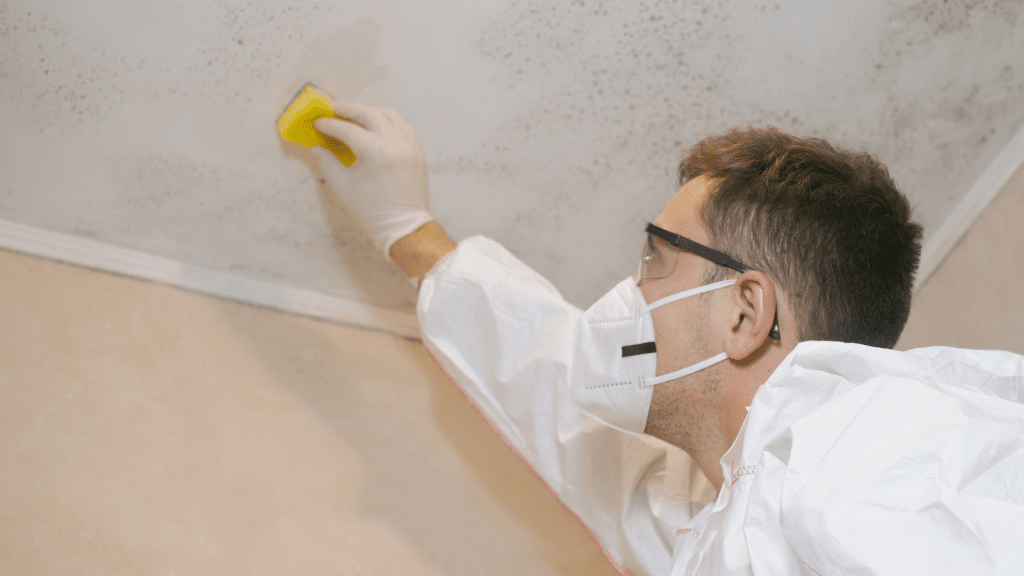
Protect Yourself:
Wear protective gear such as rubber gloves and a dust mask (an N95 mask or equivalent is ideal) when cleaning mould. Eye protection and long sleeves are also recommended. Wear old clothes that you can wash in hot water afterwards (or even discard if it was a serious cleanup).
Isolate the Area:
While cleaning, open a window in the room for ventilation, but keep doors closed to prevent spores from drifting to other parts of the house. If you have a fan, you can aim it to blow out the window to pull spores outside. It also helps to do the cleaning when others (especially children or anyone with asthma) are not in the room, to minimise their exposure.
Use the Right Cleaning Products:
Use a household mould cleaner or fungicidal anti-mould spray that’s designed for this job (available from supermarkets or DIY stores). Standard multipurpose cleaners or soap generally aren’t strong enough. There are also natural solutions people use (like white vinegar or baking soda mixtures) which can work on light mildew, but for significant mould, a proper fungicide is best. Follow the product instructions carefully, including any safety precautions on the label (some mould sprays have strong fumes, so keep that window open!).
Work Carefully:
To clean, you typically would wipe or scrub the mould off surfaces using a cloth or sponge with the cleaning solution. Avoid aggressive scraping or brushing, which can send spores flying. Start from the outside of the mould patch and work inward to avoid spreading it. After cleaning the visible mould, it’s wise to also wipe down the entire area around it (floors, nearby surfaces) with a damp disposable cloth – this helps pick up any spores that settled nearby. Put all used cloths or paper towels into a plastic bag and dispose of them outside the house.
Dry Everything Thoroughly:
After you’ve removed the mould and washed the surfaces, dry the area completely. You don’t want to leave excess moisture from your cleaning process itself. Use a fan or dehumidifier in the room afterwards, if possible, to speed up drying. Mould can start to grow back within a day or two if moisture lingers.
Don’t:
Don’t Vacuum or Dust the Mould:
Never try to dry-scrub, sweep, or vacuum mouldy areas. Dry agitation will shoot countless spores into the air, where they can spread throughout your home (and into your lungs). Vacuuming, unless you have a HEPA-filter vacuum designed for hazardous dust, will just contaminate your vacuum cleaner and exhaust spores out the back end. Always stick to damp wiping/cleaning methods for mould so the spores get trapped in your cloth, not blown around.
Avoid Using Bleach on Porous Surfaces:
A common instinct is to grab bleach for mould, but UK health guidance often advises against using bleach as a mould remedy. Bleach might kill and discolour mould on hard non-porous surfaces like tiles, but on porous materials (plaster, wood) it can make the situation worse – the water in bleach can actually seep in and feed the mould roots, and the chlorine may not penetrate deeply enough to kill all the spores. Bleach can also produce harmful fumes, especially in unventilated areas. Dedicated mould removal products are preferred, and many experts suggest using hydrogen peroxide-based cleaners or fungicidal washes instead of straight bleach. (If you do use a bleach solution on a small patch, be sure to dilute it properly and ventilate well.)
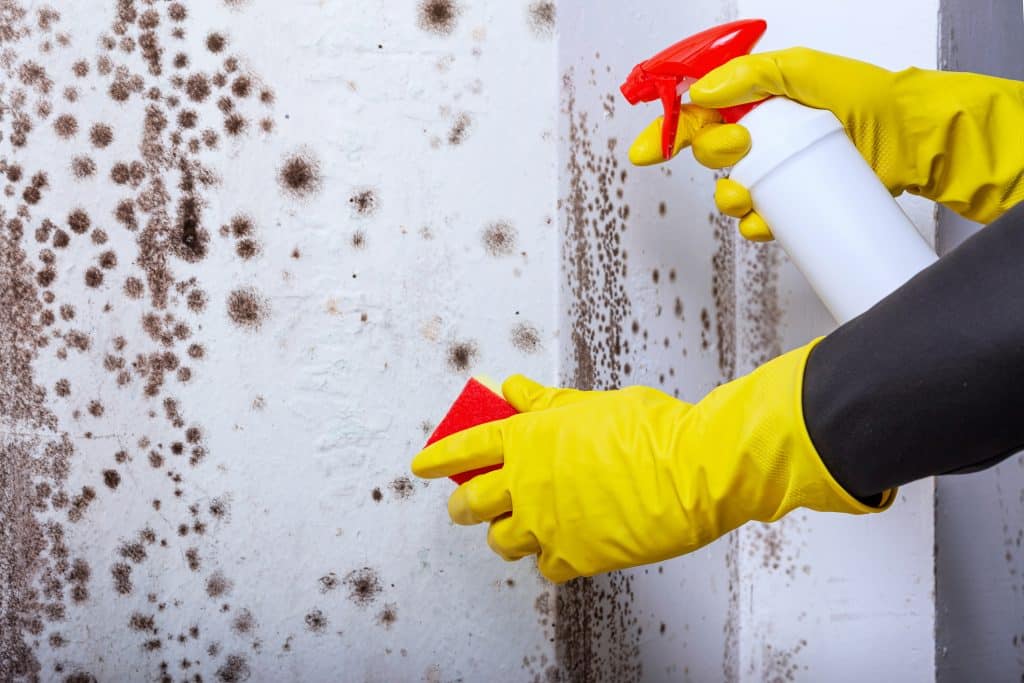
Don’t Use Inadequate Cleaners:
Similarly, ordinary household detergent or washing-up liquid is not effective for significant mould. These may remove surface grime, but won’t kill mould spores. Also, never mix cleaning chemicals (for example, bleach and ammonia-based cleaners) as this can create toxic gases.
Don’t Neglect the Cause:
Cleaning the visible mould is only a temporary fix if you haven’t solved why it appeared (excess humidity, leak, etc.). We’ll cover long-term solutions below, but just know that after you clean, you must keep the area dry. Do not simply paint over mould without treating it – the mould will likely grow through the new paint or cause it to peel. (If repainting, use a mould-resistant primer after cleaning and drying thoroughly, but only as part of a strategy that fixes the moisture problem.)
Don’t Risk Your Health:
If you have a large area of mould (more than about 1m²) or the mould keeps coming back quickly, consider calling professionals (like us!) rather than repeatedly exposing yourself. The US EPA suggests that if mould covers more than ~10 square feet, a professional remediation might be warranted. Also, if you start cleaning and find it’s triggering asthma or you feel ill, stop and get help. For severe mould infestations, or if you’re in rented housing and your landlord isn’t addressing it, you can also seek advice from your local council’s environmental health department – Helpful info here: Mouldy Allergy Advice
Finally, never ignore mould because of health concerns. The UK government has issued new guidance highlighting the serious health risks of damp and mould, urging that mould issues be dealt with promptly and thoroughly. Landlords in particular are told to act urgently – not wait for tenants to get sick – and to always tackle the underlying cause of mould, not just wipe it away superficially. The same applies to homeowners: take mould seriously and don’t put off dealing with it. Your health and home are at stake.
Dehumidifiers – Do They Help?
Dehumidifiers are appliances that remove moisture from the air by condensing it into water, which collects in a tank. They can indeed be a useful tool for mould prevention and relief, especially in cases of high humidity or persistent condensation. By keeping the air drier, dehumidifiers make it harder for mould to grow.
However, it’s important to understand their limitations. A dehumidifier is basically a short-term or supplemental fix, not a cure for a serious damp problem. Mould expert Dr Fatih Aktas notes that many professionals do not tend to recommend relying on dehumidifiers alone – largely because they don’t address the core problem causing the damp (Source – theguardian.com). For instance, if the root issue is a leak in the wall or insufficient ventilation, a dehumidifier might reduce symptoms (less condensation, slower mould spread) but won’t fix that underlying cause.
That said, if you’re in a situation where you can’t immediately solve the cause (e.g. waiting for landlord repairs, or needing a long-term building fix), a dehumidifier can be very helpful to mitigate moisture in the meantime. Many tenants in damp rentals use them as an interim measure.
Tips for using dehumidifiers effectively:
- Close the windows and doors in the room when the dehumidifier is running, so it can dry the indoor air instead of trying to dry the world.
- Place it in the area where you notice the most damp or mould (e.g. a musty bedroom, or near a bay window that gets condensated).
- Expect to empty the water tank regularly. Some models can collect several liters of water in a day from a very humid space. (This is a reminder of just how much water was lingering in your air!)
- Keep the filter (if it has one) and coils clean per the manual, so it runs efficiently.
- Be mindful of energy usage – modern dehumidifiers are not too expensive to run, but they do use electricity. You can run them in moderation (for a few hours a day or overnight) to balance humidity. Many have humidistats that let you set a target humidity (around 50-55% RH is a good target to prevent mould).
In summary, dehumidifiers can help reduce moisture and thus slow or prevent mould growth, but you should use them in conjunction with other measures. Think of a dehumidifier as treating the symptom (moist air) while you work on curing the disease (the source of the dampness). Always keep your focus on solving the root issues like ventilation, leaks, or structural damp for a permanent solution.
Short-Term vs Long-Term Mould Solutions
When dealing with a mould problem, it’s useful to differentiate between short-term actions and long-term solutions:
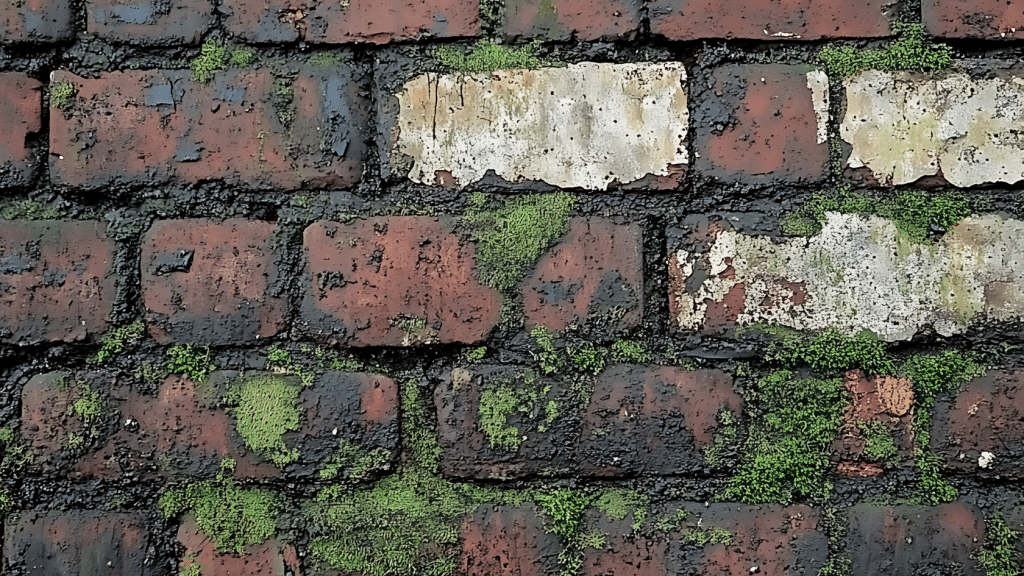
Short-Term Plan (Immediate Actions):
These are steps to get rid of existing mould and reduce immediate humidity. Short-term actions include things like: cleaning visible mould safely (as described above), opening windows and getting fans or dehumidifiers running to dry out the space, and perhaps using quick fixes like mould-repellent sprays or anti-mould paint on trouble spots. In the short term, you want to stop the mould from spreading further and alleviate the health risk. For example, if you find mould on a wall, you might clean it off and then temporarily repaint that patch with anti-mould paint to inhibit regrowth. Or if your bathroom is very humid, you might use a dehumidifier daily to keep it drier. These steps address the symptoms and can provide relief for days or weeks. However – and this is critical – short-term fixes won’t last if the underlying cause isn’t addressed. You might clean a patch of mould now, but it could return in a month if moisture returns.
Long-Term Plan (Permanent Solutions):
To stop mould from coming back, you must fix the root causes of dampness. This is the long-term strategy. Start by diagnosing why the mould appeared at that location. Is it due to condensation from indoor humidity? Is there a leak or water ingress issue? For instance, does the room lack ventilation? Is the exterior wall uninsulated and prone to condensation? Is there a crack in the wall or a faulty gutter causing water to seep in when it rains? Is it rising damp from the ground? Once you identify the cause, take corrective action: improve ventilation (install an extractor fan or trickle vents), repair building defects (fix leaking pipes, roofs, or seal gaps), consider adding insulation or thermal lining to cold walls, and so on. In some cases, you might need a professional damp-proofing solution. For example, if you have rising damp, the long-term fix could be to install or repair a damp-proof course in the wall (often done by injecting a chemical DPC barrier). If condensation is the main culprit, the solution might be a combination of better ventilation and consistent heating, or even a heat-recovery ventilation unit. Every situation can have a different permanent fix, but the goal is the same: remove the source of moisture.
It’s often said: “If you clean up the mould but don’t fix the water problem, the mould will come back.” This is absolutely true. Therefore, use your short-term actions to buy you some time and improve livability, but commit to a long-term solution concurrently. In many cases, the long-term solution will involve professionals – whether that’s a contractor repairing a leak, a ventilation specialist improving airflow, or a damp-proofing surveyor assessing your house. Don’t hesitate to get expert help if you’re not sure of the cause.
Also, keep in mind maintenance and monitoring as part of long-term care: even after repairs, continue with good practices (ventilating, controlling moisture) to prevent future issues. And check known problem spots periodically – for example, if you had mould in a corner behind a wardrobe, peek there every so often to ensure it’s staying dry after your fixes.
In summary, think of short-term measures as treating the symptoms and long-term measures as curing the disease. You really need both to effectively stop mould. Clean up what’s there now (so it doesn’t keep harming you or your home in the interim), and tackle the root moisture causes so it doesn’t recur. With this combined approach, even stubborn mould problems can be banished for good.
(A note from UK officials: simply painting over or bleaching mould without addressing why it’s growing is not a solution – “cleaning mould and repainting won’t make it go away for ever”. Always pair remediation with prevention of the cause.)
Why Do I Get Mould When It’s Raining?
Have you noticed that mould or a mildew smell tends to appear when it rains? This is a common observation. There are a couple of reasons for this rainy-weather mould phenomenon, usually a mix of external leaks and internal condensation:

Rain Penetration:
If water from rain is finding its way into your home’s structure, it can create damp patches that breed mould. For example, a leaking or overflowing gutter can cause water to run down an exterior wall and soak through, leading to internal damp on that wall. Similarly, rain could be seeping through a cracked window frame, a damaged roof tile, or poorly sealed brickwork. These kinds of leaks often become apparent after rainfall – you might see a new damp spot on the ceiling or feel a musty smell in a room following heavy rain, indicating moisture has entered. Over time, that moisture allows mould to grow on walls or in cavities. So, one reason you get mould when it rains is that the rain is literally supplying water to mould somewhere in your house (where it shouldn’t be, if all were watertight).
Humidity and Condensation:
Another very common reason is related to human behaviour and indoor climate on rainy days. When it’s wet outside, we tend to keep windows and doors shut, which reduces ventilation. At the same time, we might be doing things like hanging laundry indoors (because we can’t dry it outside in the rain) or just generally generating normal moisture from showering, cooking, breathing, etc. The result can be a spike in indoor humidity on rainy days. All that moisture has to go somewhere – and it often condenses on the coldest surfaces in the house (windows, exterior walls). This can lead to condensation dampness, which mould loves. One damp-proofing professional noted that 9 out of 10 times, the mould that people attribute to “the rain” is actually due to indoor condensation: when it rains, people close up the house and maybe dry clothes inside, raising the humidity, and that moisture then condenses on cool walls and feeds mould. Rainy weather also means higher outdoor humidity and lower temperatures, which can make your walls and windows colder and less able to evaporate moisture.
In short, rain outside can translate to moisture inside either through leaks (penetrating damp) or through altered indoor environment (condensation).
What can you do? First, inspect for any rain-related leaks: check your roof gutters and downpipes (clear any blockages), look for cracks or gaps where water might get in, ensure window frames and door seals are sound. Fixing any source of rain ingress is priority. Second, be mindful of indoor humidity on rainy days – even if it’s cold or wet, try to ventilate intermittently. You could open windows briefly between showers of rain, or use the trick of opening them on opposite sides of the house for a few minutes (cross-ventilation) when it’s not pouring down, to exchange the humid air. If it’s too cold to open up, running a dehumidifier can help (as discussed) to keep humidity in check when the house is closed. Avoid activities that add lots of moisture on those days (like boiling large pots of water without lids, if you can postpone laundry drying, etc.). And keep an eye on typical problem spots like corners of external walls or around windows – if you see condensation, wipe it up.
By addressing both potential leak issues and indoor humidity, you can break the cycle of “mould whenever it rains.” In essence, ensure your house is rainproof and maintain ventilation, and the weather shouldn’t result in mould indoors.
Mould on Walls – What Could Be Wrong?
Finding mould on your walls can be alarming – whether it’s black spots creeping up a bedroom corner or a green patch behind the sofa. Mould on walls generally indicates one (or more) of a few underlying issues:
Condensation on Cold Walls
In many cases, especially on exterior walls, mould growth (often black mould) is due to condensation. The wall’s surface is cold (due to outside cold or poor insulation), and humid indoor air hits it, and water droplets form. Over time those damp areas become breeding grounds for mould. This is very common in corners of outside walls, behind furniture placed against outside walls (where airflow is low), or on north-facing or single-brick walls that get cold. If the mould is higher up the wall or on the ceiling, it could be from warm, moist air rising and condensing at the top. Clue: You might notice water beads or a “tide mark” of moisture on the wall at times. Improving heating/insulation and ventilation in that room will usually help in this scenario.
Penetrating Damp from Outside
Mould might also mean water is seeping through the wall from outside. This is known as penetrating damp. Possible causes: damaged brickwork or pointing (the mortar between bricks) that has gaps, allowing rain in; cracked or missing render; leaking gutters above that wall; or a breach where something like a window frame or pipe isn’t sealed properly. Penetrating damp often shows as localised patches of damp or plaster blistering on the inside wall, and mould can grow around those chronically damp patches. If your mould problem is localised (say, always on one part of one wall) and especially if the wall feels damp to the touch even when it hasn’t been humid inside, investigate the exterior of that wall. Look for cracks, heavy staining, or external sources of water. A faulty gutter or roof flashing can cause a lot of hidden damp – for example, water running down inside the cavity of a wall.
Leaking Pipes or Plumbing in Wall:
Sometimes pipes (water supply or radiator pipes) run within or behind walls. A slow plumbing leak can make the wall wet and mouldy. This is trickier to spot, but clues include: the mouldy patch is near where pipes run (near a radiator, or under an upstairs bathroom), or the damp area is warm (hot water pipe leaking) or has no relation to weather/season. If suspected, a plumber or surveyor can use a moisture meter or thermal camera to check for leaks. Fixing the leak and drying the wall (might need a dehumidifier or cutting out soaked plasterboard) will then allow you to remove the mould for good.
Rising Damp (at lower walls):
If mould is appearing on the lower part of ground-floor walls, it could be due to rising damp – moisture from the ground being drawn up the wall. Rising damp typically leaves a “tide mark” or horizontal line of discolouration, usually up to 1 metre above the floor, and you might see paint or wallpaper peeling at the lower levels. It’s often accompanied by white salty deposits (efflorescence) on plaster. Mould can grow on top of that damp area. Rising damp occurs if the damp-proof course (a barrier in the wall) is missing or damaged, or if ground levels outside have been raised above the damp-proof course. True rising damp is relatively rare compared to condensation, but it does happen in older buildings or mismanaged renovations. The fix for rising damp is more involved – typically installing a new damp-proof course (via chemical injection or other methods)and replastering damaged walls. If you suspect this, you’d want a professional damp survey. The mould in this case won’t go away until the rising damp is remedied (short term, you can clean it, but it’ll recur due to constant ground moisture).
Other causes:
There are other possibilities like roof leaks causing water to run down inside wall cavities (mould might show up on an upstairs wall or ceiling edge), or building design issues (like thermal bridges causing isolated cold spots). But the above are the main categories.
What to do for mould on walls?
Clean the mould off as per earlier instructions, but more importantly, diagnose the cause. If it’s condensation, employ the ventilation/heating solutions discussed. You may also consider applying an anti-mould paint or thermal insulating paint on that wall after cleaning, which can help if condensation was the only issue. If it’s an external ingress, do the necessary repairs (re-point brickwork, fix gutters, seal windows). If it’s rising damp, that likely needs professional treatment (chemical DPC, etc.) – How to fix rising damp. Sometimes multiple factors are at play (e.g. a leaky gutter made the wall damp, plus the room is poorly ventilated). So a combination of fixes might be needed.
Lastly, after you believe you’ve fixed the cause, monitor the wall. Keep furniture a bit away, maybe use a dehumidifier in that room for a while, and see if the mould returns or if the wall stays dry. If mould does return quickly, it means the moisture problem isn’t fully solved yet and further investigation is needed.
(Remember: visible mould on walls should never be ignored – even if it looks minor, it means spores are in your air and more mould can take hold on any surface that stays damp. It’s both a health risk and a sign of dampness that could worsen, so act on it promptly.)
Identifying Mould: Look, Smell, and Touch
Sometimes you might suspect you have mould but not be entirely sure. Here are the tell-tale signs using sight, smell, and touch:
LOOK:
Visible mould can take many forms. The most obvious is the classic “black mould” spots – those little black, dark brown or dark green dots clustering on walls or ceilings (often in bathroom corners or on window caulking). But mould isn’t always black; it could appear as white or green fuzzy growth, or even orange or pinkish in some cases (like around sinks or AC units). Discolouration or staining in patchy, irregular shapes on surfaces is a hint – if a patch of wall paint or wallpaper is turning dark or greenish, or you see speckles, that’s likely mould colonisation. Mould on fabrics (carpets, clothes) might look like grey or black spots and a fuzzy texture. Also, pay attention to corners, insides of closets, behind furniture – use a flashlight to inspect those hidden areas for any coloured coating or spotting. Sometimes what looks like just grime could be mould, so if you see any mysterious new stains or growth, err on the side of caution and investigate/clean it.
SMELL:
Mould (and its cousin mildew) typically emit a musty, earthy odor. It’s the smell of dampness and decay, often compared to the scent of a dank basement or wet cardboard. If you walk into a room and consistently smell a musty odor, that’s a strong indicator of hidden mould even if you can’t see it. You might notice it more after the room has been closed up for a while. Follow your nose – often people sniff around and find the smell strongest near a particular wall or cupboard, which can pinpoint where mould is growing out of sight. Experts say “If you can smell mould, there is definitely a damp problem, even if you can’t see it”. So trust that instinct. Common places for hidden mould include under floorboards, inside wall cavities, behind drywall, under carpet padding, or inside HVAC ducts. If the smell is strong but you just can’t locate it, consider hiring a professional to perform a survey; they have tools to detect mould behind walls or in air samples.
TOUCH:
This is a less obvious sense for mould, but it can give clues about dampness. You generally shouldn’t touch mould with bare hands (risk of allergic reaction), but you can feel if a surface is damp. For instance, a wall that has mould might also feel damp or cold to the touch compared to other walls. Peeling, bubbling or powdery paint/plaster is a sign the wall has been wet – it might feel flaky or unstable under your fingers. Sometimes a wall with hidden mould will have a slight bulge or softness, indicating the material behind is decaying. If you press gently and it’s not as solid as it should be, that’s a warning sign. Also, if you wipe a suspected spot with a cloth and the cloth comes away with a colored stain or musty smell, that spot likely has mould. Again, don’t handle mould directly; if testing, use a cloth or wear gloves. Another “touch” clue is condensation – run your hand over the wall or window; if it comes away wet or you feel moisture, conditions are right for mould even if it hasn’t appeared yet.
In summary, use your eyes to spot unusual growth or stains, your nose to sniff out musty hidden colonies, and your sense of touch to find dampness that could be harbouring mould. Often these signs go together – e.g. a musty smell plus a bit of discoloration on the skirting board equals mould behind it. Early identification is important so you can tackle mould problems before they spread.
(If you’re buying or renting a property, doing a “sniff test” and checking behind furniture or in cupboards for hidden mould is always a good idea. Many people only discover severe mould after moving in, because it was concealed or just smelled musty.)
Health Advice and When to Seek Help
We’ve covered a lot about prevention and removal, but it’s worth re-emphasising the health perspective: mould can be dangerous, and not everyone should be handling it themselves. The UK’s Health and Safety Executive and other agencies have been actively educating about damp and mould hazards, especially after high-profile cases of illness and even a tragic death of a child linked to mould in housing. Here are some key health-related pointers and when to get outside help:
Know your limits (health-wise)
If you have asthma, severe allergies, COPD, or any immune system weakness, be extremely cautious about tackling mould yourself. Exposure to a lot of spores could seriously exacerbate your condition. It might be better to have someone else do the cleaning (while you stay away) or hire professionals. The NHS and Allergy UK recommend that people with mould allergies or lung conditions avoid disturbing mould and instead consult professionals for removal. Also, keep infants, young children, and elderly people away from a mould-disturbed area until it’s fully cleaned up and ventilated.
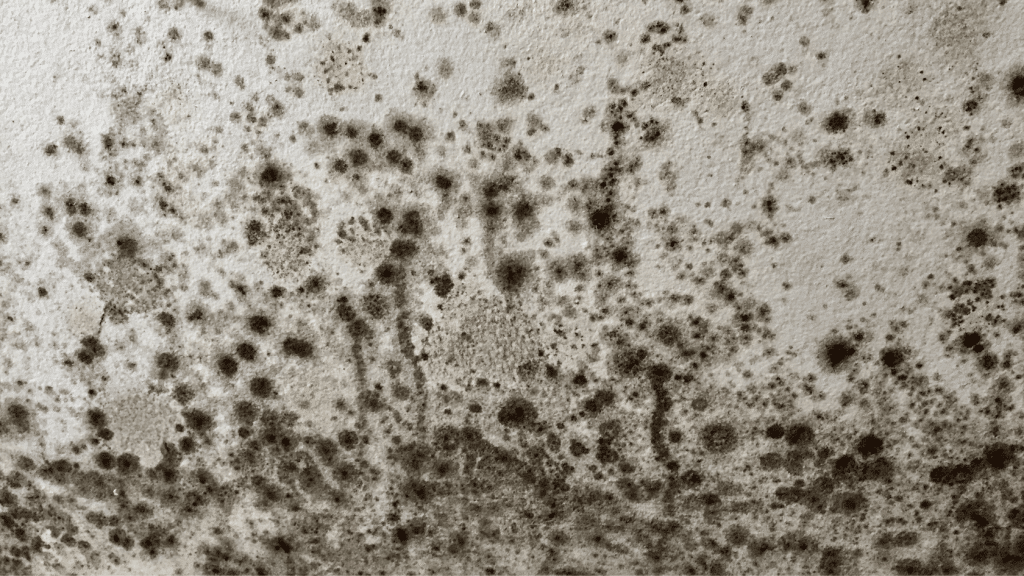
Don’t live with mould indefinitely:
It might be obvious, but sometimes people “get used to” a mould problem and co-exist with it (perhaps because of difficulty fixing it or disrepair issues). This can be quite harmful long-term. UK authorities stress that no one should have to live in a home with damp and mould – it should be addressed as a priority for health and wellbeing. If you’re renting and your landlord isn’t responsive to mould problems you report, know that there are regulations (Homes Act) that require them to act, and you can seek help from your local council’s environmental health department. The government’s guidance to landlords is to respond with urgency and not to delay action on reports of mould, given the health stakes. As a tenant or owner-occupier, you should similarly act quickly for your own sake.
When to call a professional mould remediator
Aside from the size criteria (greater than 1m² of mould, for example), other situations where you should get professional help include:
- If the mould is inside wall cavities, ventilation systems, or other inaccessible areas – professionals can handle these without spreading spores throughout the home.
- If the mould resulted from sewage or contaminated water (this is a biohazard).
- If you’ve tried to fix things and mould keeps returning quickly – there may be a hidden source of moisture that a specialist can identify with advanced tools.
- If you notice structural issues (like significant rot in wood, or black mould that’s been around a long time) – that might require not just cleaning but also repairs/replacements of materials.
- If you plan major renovations in a mouldy area – best to remediate first so you don’t trap mould behind new renovations.
- Consult health professionals if needed – If you or family members are experiencing ongoing symptoms (chronic cough, recurring bronchitis, allergic reactions) and you have mould at home, mention it to your doctor. They may advise steps like testing for mould allergy, or writing to your landlord if housing conditions are affecting health. In some cases, doctors have identified home mould as a contributor to patient illnesses. So, don’t hesitate to connect the dots and seek medical advice if you suspect mould is making you sick.
UK Government and Health Agencies’ advice:
The UK has been developing more robust responses to mould. The UK Health Security Agency (UKHSA) and the Chief Medical Officer have released reports on damp and mould health risks, calling for better prevention. The gist of public health advice is:
- Keep indoor relative humidity ideally between 40-60%.
- Ventilate homes daily.
- Heat homes adequately in winter to reduce cold surfaces (balance with energy concerns, of course).
- Address any dampness issue within 24-48 hours if possible (because mould can start growing in that time).
- Clean small patches of mould safely as we described, but do not attempt large-scale mould cleanup without proper protection or help.
- Landlords should never blame residents outright – often mould is due to structural issues or insufficient ventilation provision, not just lifestyle.
- Tenants should report issues promptly and can seek council help if landlords do not fix serious mould (which can be deemed a hazard under housing health regulations).
If you’re overwhelmed or unsure about dealing with mould, getting a professional survey or remediation service is worth it. It can cost some money, but consider it an investment in your health and home. Professionals can not only remove mould more safely (using proper containment and filtration) but also treat surfaces to resist re-growth and give you expert insight into why it happened.
Speaking of which, in the next section we’ll discuss surveys – which are especially relevant if you’re dealing with persistent mould or considering buying a property that has signs of mould.
Buying a House with Mould – What Should You Do?
Discovering mould in a property you want to buy is a red flag, but it doesn’t have to be a deal-breaker if handled correctly. Here’s how to approach it:
Don’t ignore it or assume it’s “no big deal.”
Mould (and the damp causing it) is something you’ll want to address before or soon after purchasing a home. It can devalue the property and will require remediation. Use it as a negotiation point – a house with a mould problem may need price adjustment or the seller to fix it. But first, you need to know the extent of the issue.
Get a professional mould or damp survey.
When buying a house, a standard home survey might note “dampness detected” or visible mould, but they often suggest getting a specialist pre-purchase damp survey and/or timber survey for a thorough investigation. It’s highly recommended to bring in a qualified surveyor or damp specialist to do a mould and damp survey on the property. These professionals will use tools like moisture meters and even thermal cameras to find hidden damp areas. They’ll identify what’s causing the mould – be it condensation from poor insulation, a leaking roof, rising damp, etc. – and give you a report on what needs to be done to fix it. This information is crucial. For example, if the survey finds that the entire ground floor has no effective damp-proof course and is riddled with rising damp, you’re looking at a potentially expensive treatment. You can then decide if you still want to proceed with the purchase and perhaps ask the seller to contribute to the repairs or lower the price.
Factor in remediation costs and plans.
Use the survey report to estimate what it will cost to sort out. Minor mould due to say, poor ventilation, might be solved with a few hundred pounds (installing extractor fans, etc.). Major structural damp could run into the thousands. Knowing this lets you budget and negotiate. Sometimes sellers might agree to fix the issue before sale, or you take it on but pay a bit less.
Health considerations in a new home:
If you have family members who are allergic or sensitive, be extra careful. Even after you treat mould, spores can linger. Plan to do a deep clean (maybe even replace mouldy carpets or curtains) and ensure the house is dried and ventilated thoroughly before moving in. In some cases, people use professional mould remediation companies pre-move-in to clean the air and surfaces, especially if it was a severe infestation.
Future prevention:
Once you’ve bought the house and fixed the immediate mould problem, take measures to prevent recurrence – many of which we’ve discussed (good ventilation, perhaps installing a Positive Input Ventilation (PIV) unit or humidity sensor fans, maintaining the property well, etc.). Essentially, you want to ensure that by the time you’re living there, the house is dry, and stays dry.
It’s worth noting that companies like us at Nordic Damp Proofing offer damp and mould surveys to homeowners and buyers – they will inspect the property, diagnose issues, and recommend treatment solutions. This can be extremely helpful if you’re unsure about the severity of a mould problem. A professional survey can give you peace of mind by answering: How widespread is the mould? What is the cause? What’s the treatment plan and cost? Armed with that, you can make an informed decision about the purchase.
Buying a house with mould isn’t automatically a no-go, but it is something that should always be investigated thoroughly. Some mould issues are easy fixes, but others can hide deeper damp problems. By getting expert input, you’ll avoid nasty surprises after you move in. And if the problem is substantial, you have the opportunity to either back out or renegotiate the deal. Many people successfully buy “damp” houses and, with proper treatment, turn them into warm, dry homes. Just go in with eyes open (and nose alert for that musty smell!).
In any case, prioritize making the environment healthy. The value of a mould-free, dry home cannot be overstated – both for your financial investment and for your health.
To conclude…
Mould might be a formidable foe in the home, but with knowledge and timely action, it can be found, treated, and prevented from coming back. We learned that mould thrives on moisture, so controlling dampness through ventilation, heating, and maintenance is the cornerstone of prevention. We also discussed safe cleaning practices for minor mould, and emphasised not to just wipe it away but to eliminate the underlying causes – whether that’s fixing leaks, installing better ventilation, or addressing structural damp issues.
If you remember nothing else, remember this: deal with mould promptly (small issues can grow into big ones), and don’t hesitate to seek professional help for persistent or severe problems. The health of your home and family is worth the effort.
As a final note, the experts at Nordic Damp Proofing have a fitting motto about tackling these issues – “We Find It. We Treat It. We Stop It Coming Back.” This encapsulates the proper approach: find the mould (and its moisture source), properly treat and remove it, and take measures to prevent its return. With that strategy in mind, you can conquer mould and enjoy a cleaner, healthier living space for the long term.