
Is your home feeling damp and clammy? Don’t worry – you’re not alone, and help is at hand! Damp in houses is a very common problem, especially in our soggy UK climate (looking at you, Southampton and the rest of rainy Hampshire!). In fact, dampness issues are among the most frequent problems in homes. Not only is damp unpleasant (musty smells and mould, yuck!), it can also damage your property and even affect your health. A recent survey found 87% of people would be put off buying a house with damp problems (Source – safeguardeurope.com) – so it’s definitely something you’ll want to tackle head-on. In this friendly guide, we’ll explain what damp proofing is, why damp happens, how to damp-proof your home, and how to keep damp away for good. Let’s dive in!
What Is Damp Proofing?
Figure: A thin metal damp-proof course (DPC) installed between a stone foundation and the brick wall above. This physical barrier prevents rising damp by blocking moisture from wicking up through the wall.
Damp proofing in construction is a method of moisture control applied to walls and floors to stop water from passing into interior spaces.. In simpler terms, it means making your building resistant to dampness. Usually, this is achieved by adding barriers or membranes to the structure to prevent water ingress. For example, when a house is built, the builders install a damp-proof course (often just called a DPC) – typically a waterproof layer built into the base of the walls, about 150 mm above ground level, to prevent moisture rising up from the ground. Without a proper DPC, water from the soil can creep up brick or stone walls by capillary action, a phenomenon known as rising damp.
Damp proofing isn’t just for new builds – older houses can be retrofitted with modern barriers too. There are various damp proofing services available (we’ll get to those in a moment). The main goal is always the same: keep external moisture out of your home’s interior. It’s worth noting that damp proofing is related to waterproofing but slightly different. Generally, damp proofing keeps out soil moisture (no pressure), whereas full waterproofing is needed to resist water under pressure (like in basements). For most homes, a good damp proof course and proper sealing are enough to stay dry under normal conditions.
Why Does Damp Happen in Homes?
If you’re noticing damp patches, peeling paint, or mysterious mould spots, you’re probably wondering “Why me? What’s causing this damp?” Damp problems can stem from a variety of causes, and identifying the source of moisture is the crucial first step. Here are the usual suspects:
Condensation:
This is the most common cause of damp in UK homes. Condensation happens when warm, moist air hits cold surfaces (think of steamy bathroom air hitting a cold wall). The moisture in the air cools and turns to water droplets on your walls or windows. Over time, this surface condensation can lead to damp patches and mould. Everyday activities like cooking, bathing, and even breathing (yes, we humans produce moisture!) contribute to indoor humidity. Poor ventilation or inadequate heating makes it worse, as the moist air has nowhere to go. Fun fact: Even hidden “interstitial” condensation can occur inside walls if warm, moist air seeps in and cools there.

Rising Damp:
As mentioned, rising damp is caused by moisture from the ground travelling up through porous walls by capillary action. It typically affects ground floor walls up to about 1 metre high. If your building’s damp-proof course is missing, damaged, or bridged, rising damp can take hold. For example, in very old houses (pre-1875 or so) there may be no DPC at all. In other cases, the DPC exists but has failed or been “bridged” – meaning something is allowing water to bypass it. Common DPC bridges include debris in the wall cavity, earth or paving piled against an external wall above the DPC, or even insulation installed incorrectly. Without an effective barrier, groundwater can seep up and cause that tell-tale tide mark on your walls.
Penetrating Damp:
This refers to moisture coming through the walls or roof from the outside. Unlike rising damp (which comes from below), penetrating damp usually comes horizontally or from above, wherever water finds a way in. Typical causes are leaky gutters, broken roof tiles, cracks in the walls or faulty pointing, and any damage that lets rainwater penetrate the masonry. Even something like a leaking overflow pipe or a cracked chimney flashing can create damp patches on walls over time. Essentially, if you have any part of the building that isn’t weather-tight, water will find its way in – gravity will make it penetrate downward or sideways into your interior plaster. Homes with solid walls (no cavity) are especially prone to this, as there’s no gap to stop water soaking through. Proper maintenance (fixing your roof, flashing, repointing decayed mortar, etc.) is key to preventing penetrating damp.
Plumbing Leaks & Other Causes
Sometimes the cause is entirely internal – a leaky pipe, an overflowing bath, or a washing machine that’s not plumbed correctly can all introduce unwanted moisture. Flooding incidents also obviously cause damp (and require serious drying out). And in basements or cellars, water ingress can happen through walls/floors if they aren’t properly tanked or if the water table rises – this crosses into the territory of basement waterproofing rather than standard damp proofing.
In summary, damp happens when moisture meets a vulnerable surface. It could be from inside (condensation or leaks) or outside (groundwater or rain). Often, a combination of factors is at play. A good survey can diagnose the root cause – speaking of which, if you’re unsure why you have damp, consider booking a professional Damp Survey to get an expert diagnosis and tailored solution.
What Are the Signs of Damp in Your House?
Not sure if that blotch on the wall is damp? Here are some common signs of dampness to look out for, using all your senses:
Sight
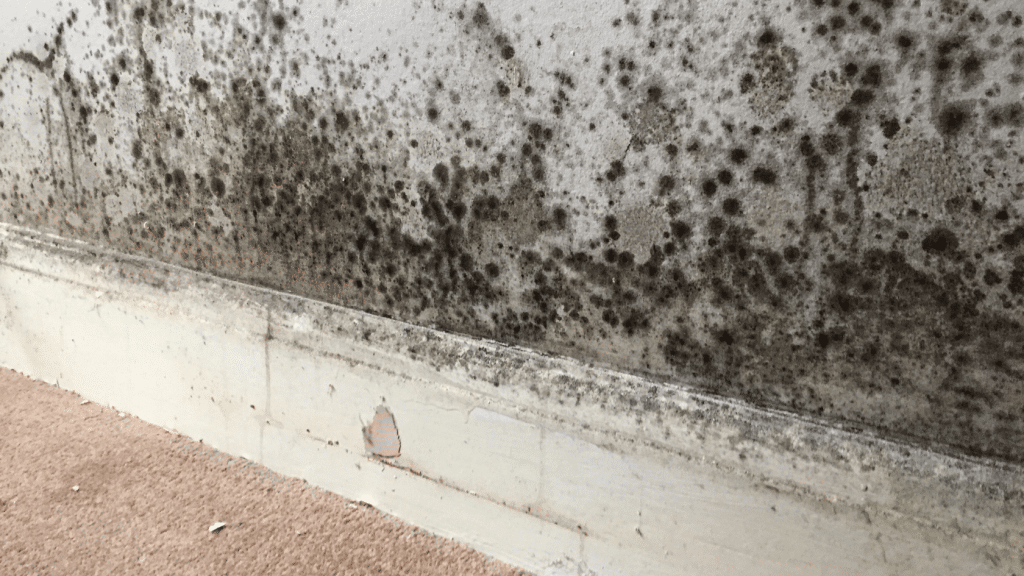
Look for discolouration or “tide marks” on walls – damp often leaves a yellowish or brown stain and a fuzzy line as it rises. Paint or wallpaper peeling, bubbling, or blistering is a red flag (moisture causes the finish to lose adhesion). You might also spot black mould spots, especially around corners, behind furniture, on ceilings, or on window frames. Black mould loves damp, and it often appears as small black dots that can spread into a patch. Also check floors and skirtings: warped or rotten wood, or signs of woodworm, can indicate chronic damp. In a ceiling, yellow/brown rings can indicate water from a leak above.
Smell
Damp has a distinctive musty, earthy odour. If a room or cupboard smells persistently musty no matter how much you clean, it could be harbouring mould or mildew from damp conditions. Sometimes you might smell the damp before you see it.
Touch
Walls that feel cold or wet to the touch are a bad sign. If you suspect a patch is damp, compare it with other walls – a damp wall will often feel cooler. In extreme cases, you might even feel actual wetness. Plaster can become soft or crumbly when damp; paint may feel loose. Also, condensation on windows (excessive water collecting on the inside of glass) each morning is a clue that your indoor air is very humid, which can lead to condensation damp on walls.
Other clues
Damp conditions often go hand-in-hand with mould growth on fabrics. Check if curtains or furnishings near external walls have mildew or mould, or if clothes in wardrobes get a bit fusty. This could indicate high humidity and hidden damp. Another hint is excessive condensation on cold surfaces like toilet tanks or metal pipes – showing that moisture is lingering in the air.
If you notice any of these signs, don’t ignore them! Aside from damaging your décor, damp can cause mould growth, which is a known cause of respiratory allergies and health issues. It can also lead to wood rot in structural timbers if left unchecked (requiring specialist timber treatment for issues like wet rot or dry rot). The sooner you identify and treat the source of damp, the easier (and cheaper) it will be to fix.
How Do I Damp Proof My Home?
So, onto the big question – how do you actually do damp proofing? The exact method depends on the cause and location of the damp, but generally damp proofing involves installing or restoring a barrier that stops moisture. Here are the most common damp proofing methods and solutions for homeowners:

Damp-Proof Course (DPC) Installation:
A damp-proof course is a barrier layer built into the wall, usually about 6 inches (150 mm) above ground level. In modern homes this might be a strip of thick plastic or bitumen-based material within the mortar joint. In older houses, materials like slate or engineering bricks were used historically. If your home’s DPC is missing or failing, you can have a new one installed. One option is damp proof course installation via cutting into the mortar and inserting a new physical DPC (e.g. a plastic strip or metal sheet). However, cutting into all your walls is a big job, so a more common remedy for existing walls is chemical DPC injection.
Chemical Damp-Proof Injection:
This is a popular method to retrofit a DPC without major construction. Small holes are drilled into the base of the wall (mortar line), and a water-repellent chemical is injected which soaks into the bricks/mortar and then solidifies to create a horizontal waterproof barrier. Newer products include injected creams or even damp-proofing rods that you insert into drilled holes. These methods are proven and much less disruptive than physically rebuilding the wall. If rising damp is your issue, a Rising Damp Treatment via chemical DPC is usually recommended. Likewise, many damp proofing services (like ours in Southampton, Hampshire & Dorset!) use certified injection creams to stop rising damp in its tracks.
Damp-Proof Membrane (DPM):
While a DPC protects walls from rising moisture, a damp-proof membrane is typically used to protect floors or even walls from moisture coming through from the other side. A DPM is usually a thick plastic sheet or membrane that is laid under concrete floors or on walls to form a continuous moisture barrier. For example, when pouring a new concrete ground floor, builders lay a polyethene DPM underneath so that moisture from the soil can’t seep up into the slab. On walls, special membrane sheets or sealant layers can be applied internally as part of a remedial treatment (often in conjunction with re-plastering). There are also liquid DPMs, essentially waterproof coatings you can paint on walls/floors to achieve a similar barrier. If you have a damp basement, a combination of basement waterproofing membranes and a proper drainage system might be needed.
Integral Damp Proofing:
This technique is mainly used in new construction or major renovations. It involves adding water-repellent admixtures into concrete or mortar, so the material itself becomes less permeable. Essentially, the concrete is mixed with compounds that fill its pores or repel water. This integral approach is great for things like basement walls or foundation slabs where you want to build moisture resistance right into the structure. While not a DIY thing for an existing wall, it’s good to know for any new extensions or builds you do.

Waterproof Coatings and Sealants:
Sometimes the solution to damp is to apply a surface waterproof coating. This can be on the exterior (for example, a water-repellent cream for brickwork, or a weatherproof paint) to stop rain soaking in. Or it can be on the interior side (like a liquid damp-proof membrane, tanking slurry, or waterproof render) to hold back moisture. These are especially useful for tackling penetrating damp or in basements. However, beware: simply slapping waterproof paint on an internally damp wall won’t fix the underlying cause – it might just trap moisture inside. These coatings are best used after the source of water is stopped, as an extra layer of protection. For non-pressurized moisture (like general rain splash), a thin waterproof coating (e.g. epoxy resin paint or cementitious slurry) can be effective. Heavy-duty options like shotcrete (sprayed cement) can even resist water under pressure, but those are typically for below-ground applications. For most homeowners, products like anti-damp paint, exterior silicone water-repellent, or internal tanking compound are more common.
Cavity Wall and Drainage Measures:
If you have cavity walls (common in post-1920s houses), they are actually designed as a form of damp protection – the gap between the outer and inner wall keeps water from reaching your inner wall. But this only works if the cavity is clear and functioning. Blocked or bridged cavities (due to debris or ill-installed cavity wall insulation) can cause damp to transfer across. The solution is to clear the cavity or install proper cavity trays/weep holes where needed. According to building regulations, an external cavity wall’s gap should extend at least 225 mm below the DPC level or have a cavity tray to catch water. If you suspect cavity issues, you may need to consult professionals (sometimes cavity insulation removal or installing new trays is necessary). Additionally, ensure you have good drainage around your property. Water pooling next to the walls will eventually find a way in, so keep those gutters and downpipes clear, and consider French drains or proper grading of soil away from the house.
Addressing Condensation (Ventilation & Insulation):
Traditional “damp proofing” methods mainly address water ingress from outside or below. But if condensation is your big issue, the fix is usually improving ventilation and insulation rather than adding membranes. Here are some tips:
- Increase ventilation by using extractor fans in bathrooms/kitchens and by opening windows regularly (even a small trickle vent helps).
- Avoid drying laundry indoors or using unvented gas heaters that add lots of moisture.
- Keep your home adequately heated in cold weather – warmer walls mean less condensation.
- You might also consider installing positive-pressure ventilation systems or dehumidifiers in stubborn cases.
- For chronic humidity, professional condensation & damp control services can install vents or PIV units to regulate airflow.
- \Adding thermal insulation to very cold walls (internally or externally) can also raise surface temperatures and reduce condensation.
- And of course, if mould has already taken hold, a thorough mould removal and treatment with anti-mould products will be necessary as part of the remedy.
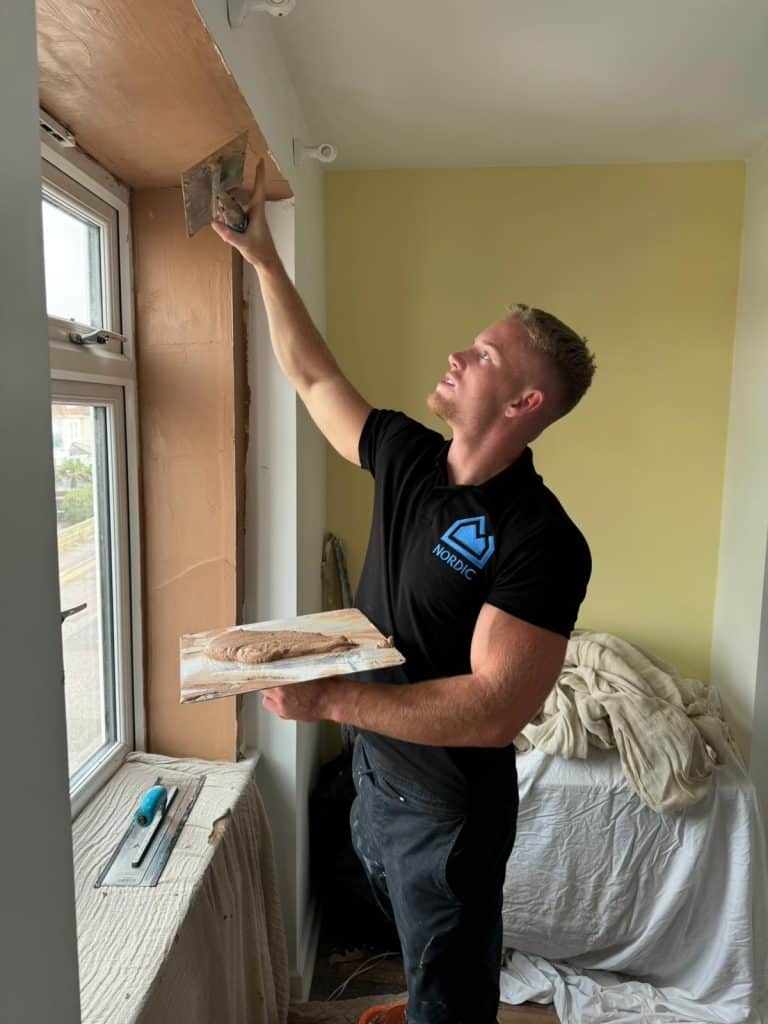
As you can see, “damp proofing” isn’t one-size-fits-all – it’s a toolkit of different methods. Often, a combination of solutions is used. For example, a typical rising damp treatment might involve injection DPC, followed by stripping off damaged plaster, applying an internal waterproof render or membrane, then re-plastering with a salt-resistant plaster. For penetrating damp, the solution could be as simple as fixing a gutter and replastering, or as involved as externally waterproofing a wall and installing a drainage channel. The key is tailoring the fix to the cause. If in doubt, consult a professional damp surveyor or a qualified contractor (like our team of damp proofing specialists based in Southampton 😃).
How Can I Prevent Damp in the Future?
Once you’ve gotten rid of damp, you’ll want to keep it from coming back. Prevention mostly comes down to maintenance and good habits. Here are some golden rules for a dry home:
Keep your home ventilated and warm:
As mentioned, condensation is a major culprit. Open windows or use trickle vents when you can (especially after showers or when cooking). Use extractor fans in bathrooms and kitchens – and if you don’t have them, invest in having some fitted. Try to maintain a steady, reasonable temperature in the house during colder months to avoid cold surfaces where moisture can condense. Good insulation also helps walls stay warmer.
Regular maintenance checks:
A lot of penetrating damp issues can be prevented by simple upkeep. At least once or twice a year, especially after autumn leaf-fall, clear out your gutters so they don’t overflow. Check for any leaks or dripping from gutter joints or downpipes during rain. Inspect your roof (with binoculars or from a ladder if safe) for missing or broken tiles. Keep an eye on exterior paint or render – cracked render or peeling paint can let water in. If you have an older brick home, check the pointing (mortar between bricks) – crumbling pointing should be repointed to keep the wall sealed. Don’t forget to look at window frames and door seals – gaps can let water seep around and cause damp patches internally. By catching issues early, you prevent the prolonged ingress that causes serious damp.

Mind the landscape:
Ensure the ground outside is lower than your DPC. UK building regs suggest DPCs at least 150 mm above ground or paving, so you don’t want soil or flower beds piled higher than that against your walls. If you’re adding a patio or path, make sure it slopes away from the house. Also, if you have air bricks (for underfloor ventilation in older houses), keep them clear of debris or blockages – these vents help prevent moisture buildup under your floors.
Reduce indoor humidity:
In daily life, try to minimize excess moisture. Dry clothes outdoors or in a vented dryer whenever possible (yes, we know British weather doesn’t always oblige!). Avoid paraffin or gas heaters that vent into the room – they release lots of water vapour. Cover your pans when boiling and use the extractor fan. If you find your home is still very humid, consider using a dehumidifier in problem areas. It’s also wise to leave some gap behind furniture against external walls, so air can circulate and you don’t get mould growing behind the closet.
Use protective finishes wisely:
If you’ve had issues with mould in, say, a bathroom, repaint with a good anti-mould paint or add mould inhibitor to the paint. In rooms prone to damp or condensation, a moisture-resistant paint or a soft sheen finish can be more durable than standard matte. Outside, if your brickwork absorbs a lot of rain (some bricks are quite porous), consider applying a breathable water-repellent cream to the masonry. It can significantly reduce water absorption while still letting the wall breathe out trapped moisture. Just remember: these products are preventative; they won’t magically dry out a wall that’s already soaked.
By following these practices, you’ll greatly reduce the chance of damp returning. Think of it like this: a dry home is a healthy home. Not only will you avoid the icky sights and smells, but you’ll also protect your property value and your well-being. The NHS and health experts warn that damp and mouldy environments can aggravate asthma and allergies, so it’s definitely worth the effort to keep your living space dry and mould-free.
Can I Just Paint Over Damp Patches? (Hint: No!)
It’s tempting to take a shortcut when you see an ugly, damp stain – just paint over it and pretend it’s not there. Unfortunately, that’s a short-term fix at best, and can make things worse. Covering up a damp patch without addressing the underlying moisture is like putting a plaster on a leaky pipe – it doesn’t solve the problem, and the water will find a way out eventually. You might seal moisture into the wall, causing paint to bubble and peel, and mould could continue to grow beneath the paint layer. In some cases, you can even trap water inside the wall, leading to more serious damage over time.
The proper approach is: fix the cause of the damp first, then deal with the cosmetic repairs. This often means stripping off damaged paint or plaster, letting the area dry fully (using heaters or dehumidifiers if needed), and then applying a specialist sealer or primer before repainting with mould-resistant paint. If plaster or drywall has been ruined, it may need re-plastering (for example, after treating rising damp, it’s standard to hack off the salt-contaminated plaster and re-plaster with a salt-retardant mix as part of the wall repair & re-plastering). Remember, simply painting over without solving the damp source will likely result in the stain coming right back through your fresh paint, or the new paint not adhering.
So, resist the quick cover-up. By all means, beautify your home – but do it the right way, in the right order. As the saying goes: don’t put the cart before the horse (or the paint before the damp, in this case!).
When Should I Call a Professional?
Some minor damp issues you can handle yourself (for example, a bit of condensation mould on a bathroom ceiling can be scrubbed away and painted with anti-mould paint). However, many damp problems are tricky to diagnose and treat properly without professional expertise. Here are scenarios when you should consider calling in the pros:
Uncertain Source:
If you see signs of damp but have no idea where it’s coming from – a professional damp and timber survey can save you time and money in the long run. Misdiagnosing damp is common (people often confuse condensation with rising damp, etc.). A qualified surveyor will use moisture meters, maybe thermal imaging (Thermal Imaging Damp Surveys), and their expert eye to pinpoint the cause.
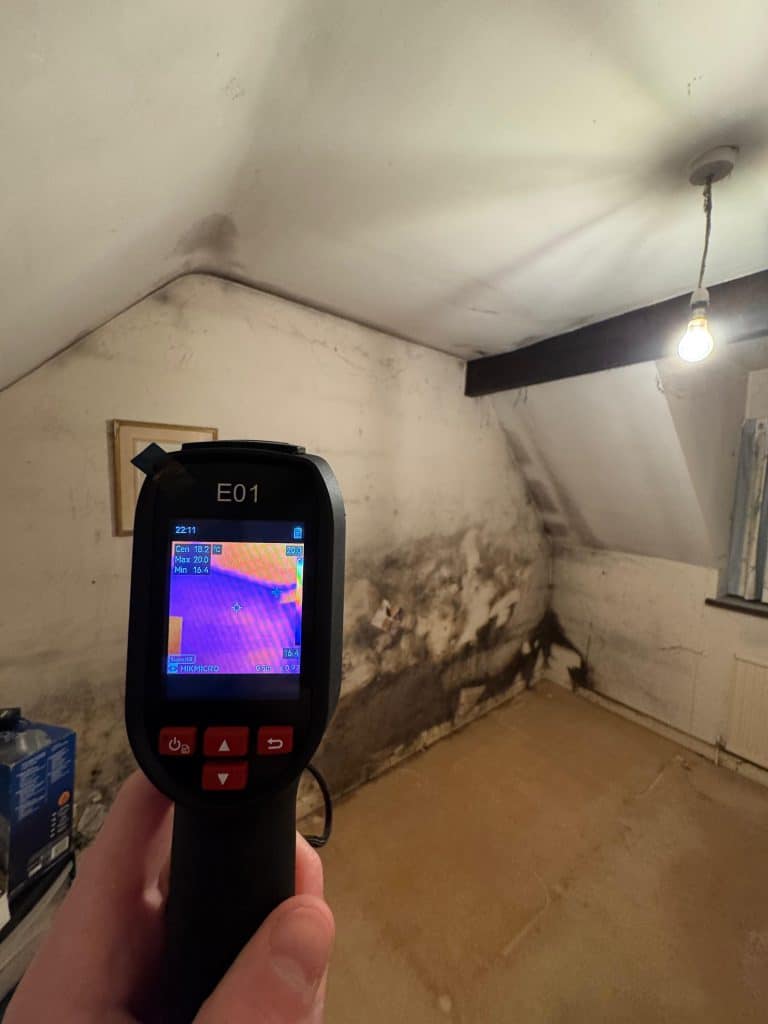
Suspected Rising Damp or Structural Damp:
Treatments like chemical DPC injection, structural waterproofing, or extensive timber treatments for rot should be done by experienced contractors. They will ensure the right materials and methods are used, and often provide guarantees. If your damp problem involves the building’s structure (foundation, walls, structural timbers), get an expert to assess it. For example, what looks like rising damp might actually be an internal leak or a bridging issue – a pro will differentiate and prescribe the correct fix.
Severe Mould or Health Concerns:
If you have a lot of black mould growth, it can be a health hazard. Professional mould removal services will not only clean it safely (with proper protective gear and treatments to kill spores) but also address the cause so it doesn’t return. This is especially important for rental properties – landlords are legally obligated to address serious damp and mould as it can be classified as a hazard under housing health regulations (Housing Act 2004, HHSRS).
Before Buying or Selling a House:
If you’re in the process of buying a property and a survey flags damp, get a specialist damp survey done for peace of mind. Likewise, if you plan to sell your house and it has visible damp, it’s wise to fix it beforehand or at least get quotes – buyers are often scared off by damp (and may negotiate the price down heavily). In England, you must declare known damp issues when selling, so it’s better to be proactive. Many companies (like us) offer pre-purchase or pre-sale damp reports to detail the extent of the issue and the remedial costs.
In short, don’t hesitate to call a professional if damp is out of your depth. What might seem like a daunting, expensive repair often isn’t as bad as it looks once proper treatment is done. As one industry expert noted, most damp problems are straightforward to deal with when using modern methods, and rarely cost as much as people fear. Getting it sorted will not only make your home more comfortable but also protect its value.
Keep Calm and Banish the Damp!
Dealing with damp can feel overwhelming, but now you should have a clear understanding of what causes damp, how damp proofing works, and how to prevent future problems. Remember, always tackle the root cause of moisture first – whether that’s improving ventilation for condensation or installing a new damp-proof course for rising damp. With a bit of detective work and the right solution, even the dampest dungeon of a house can be transformed into a warm, dry haven.
If you need help or advice specific to your home, we’re here for you. We’re based in Southampton and proudly serve all across Dorset and Hampshire as trusted damp-proofing specialists. We can provide comprehensive damp proofing services from initial damp surveys to full installation of membranes, injections, and everything in between. Our team loves to educate and assist homeowners – consider us your damp-busting partners (with a good sense of humour to boot!).
Don’t let the damp grind you down. With the knowledge from this guide and the help of qualified pros when needed, you can say goodbye to damp and hello to a healthier, happier home. If you’re concerned about any damp issues, feel free to book a survey with us – we’ll assess what’s going on and recommend effective, long-lasting solutions. Here’s to a dry and comfy home, rain or shine!